INSTALLATION
INSTRUCTIONS. MOUNTING DETAILS. CUTTING TIPS
QUICK DOWNLOAD
INSTALLATION QUICK TIPS & TRICKS
Measure Twice, Cut Once-
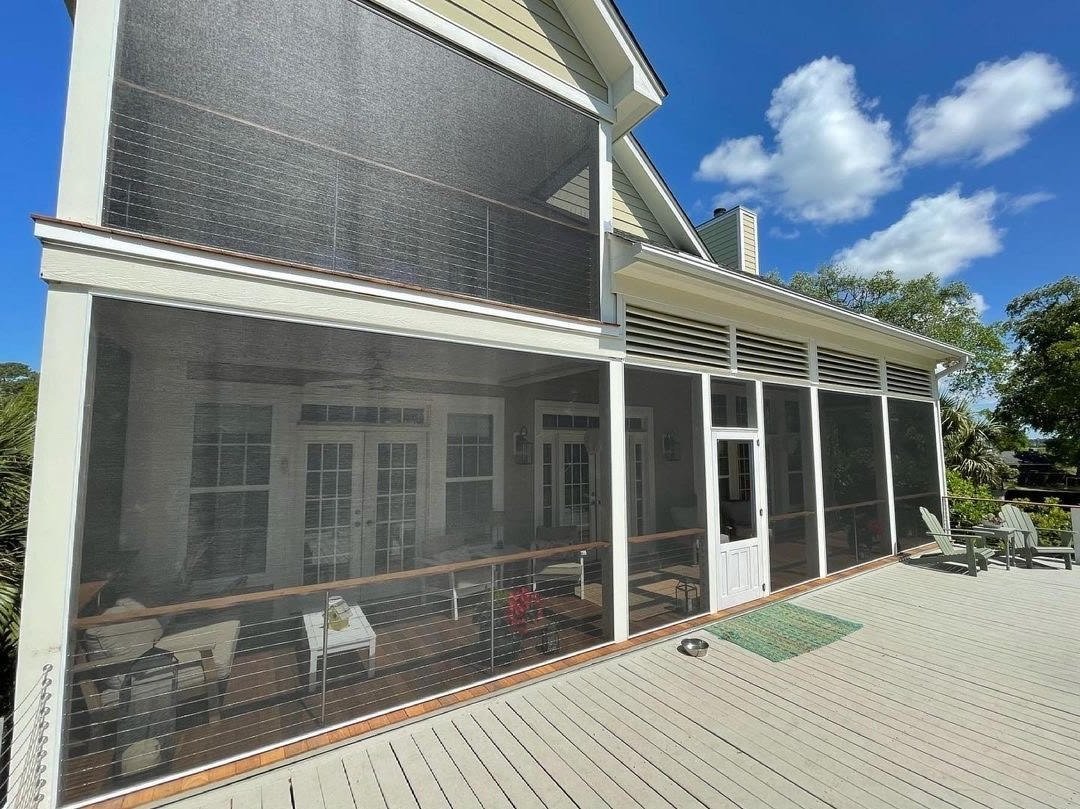
Planning your project is one of the most important steps. While preparing to decide what to order, first figure out what system and mount type you will use. Every porch is different and can only adapt to certain mounting applications.
SCREENEZE Flush Mount
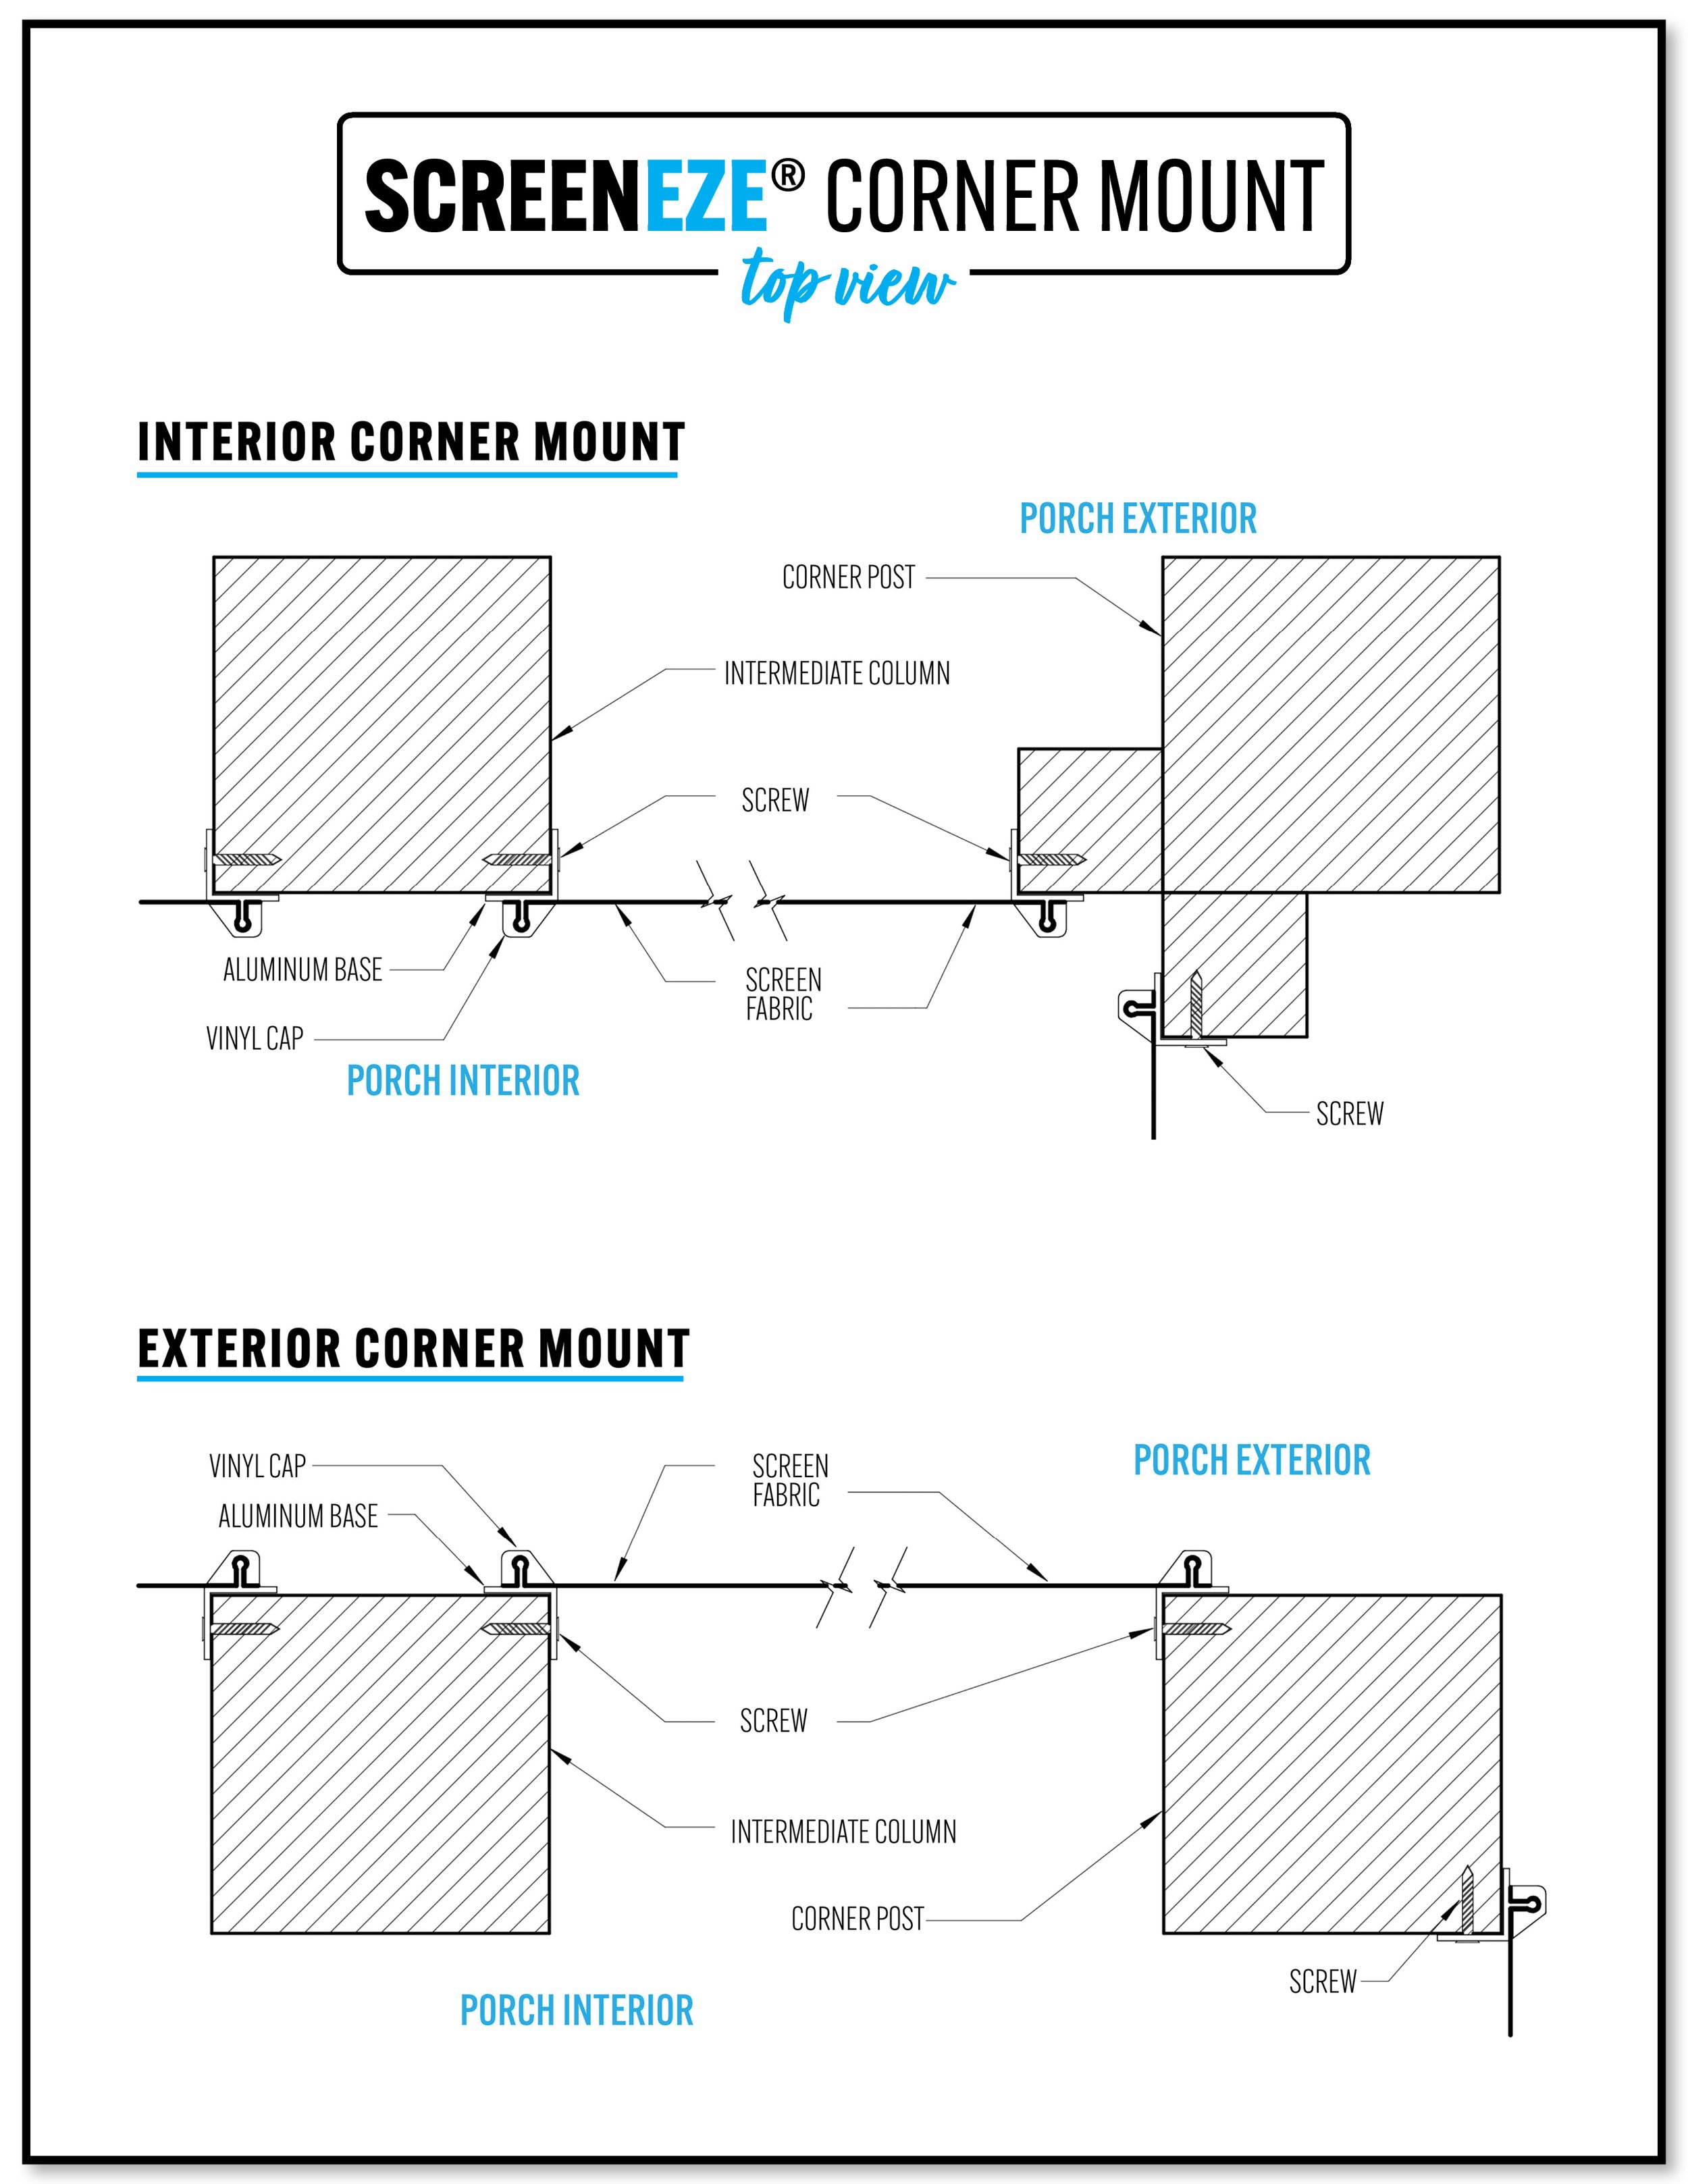
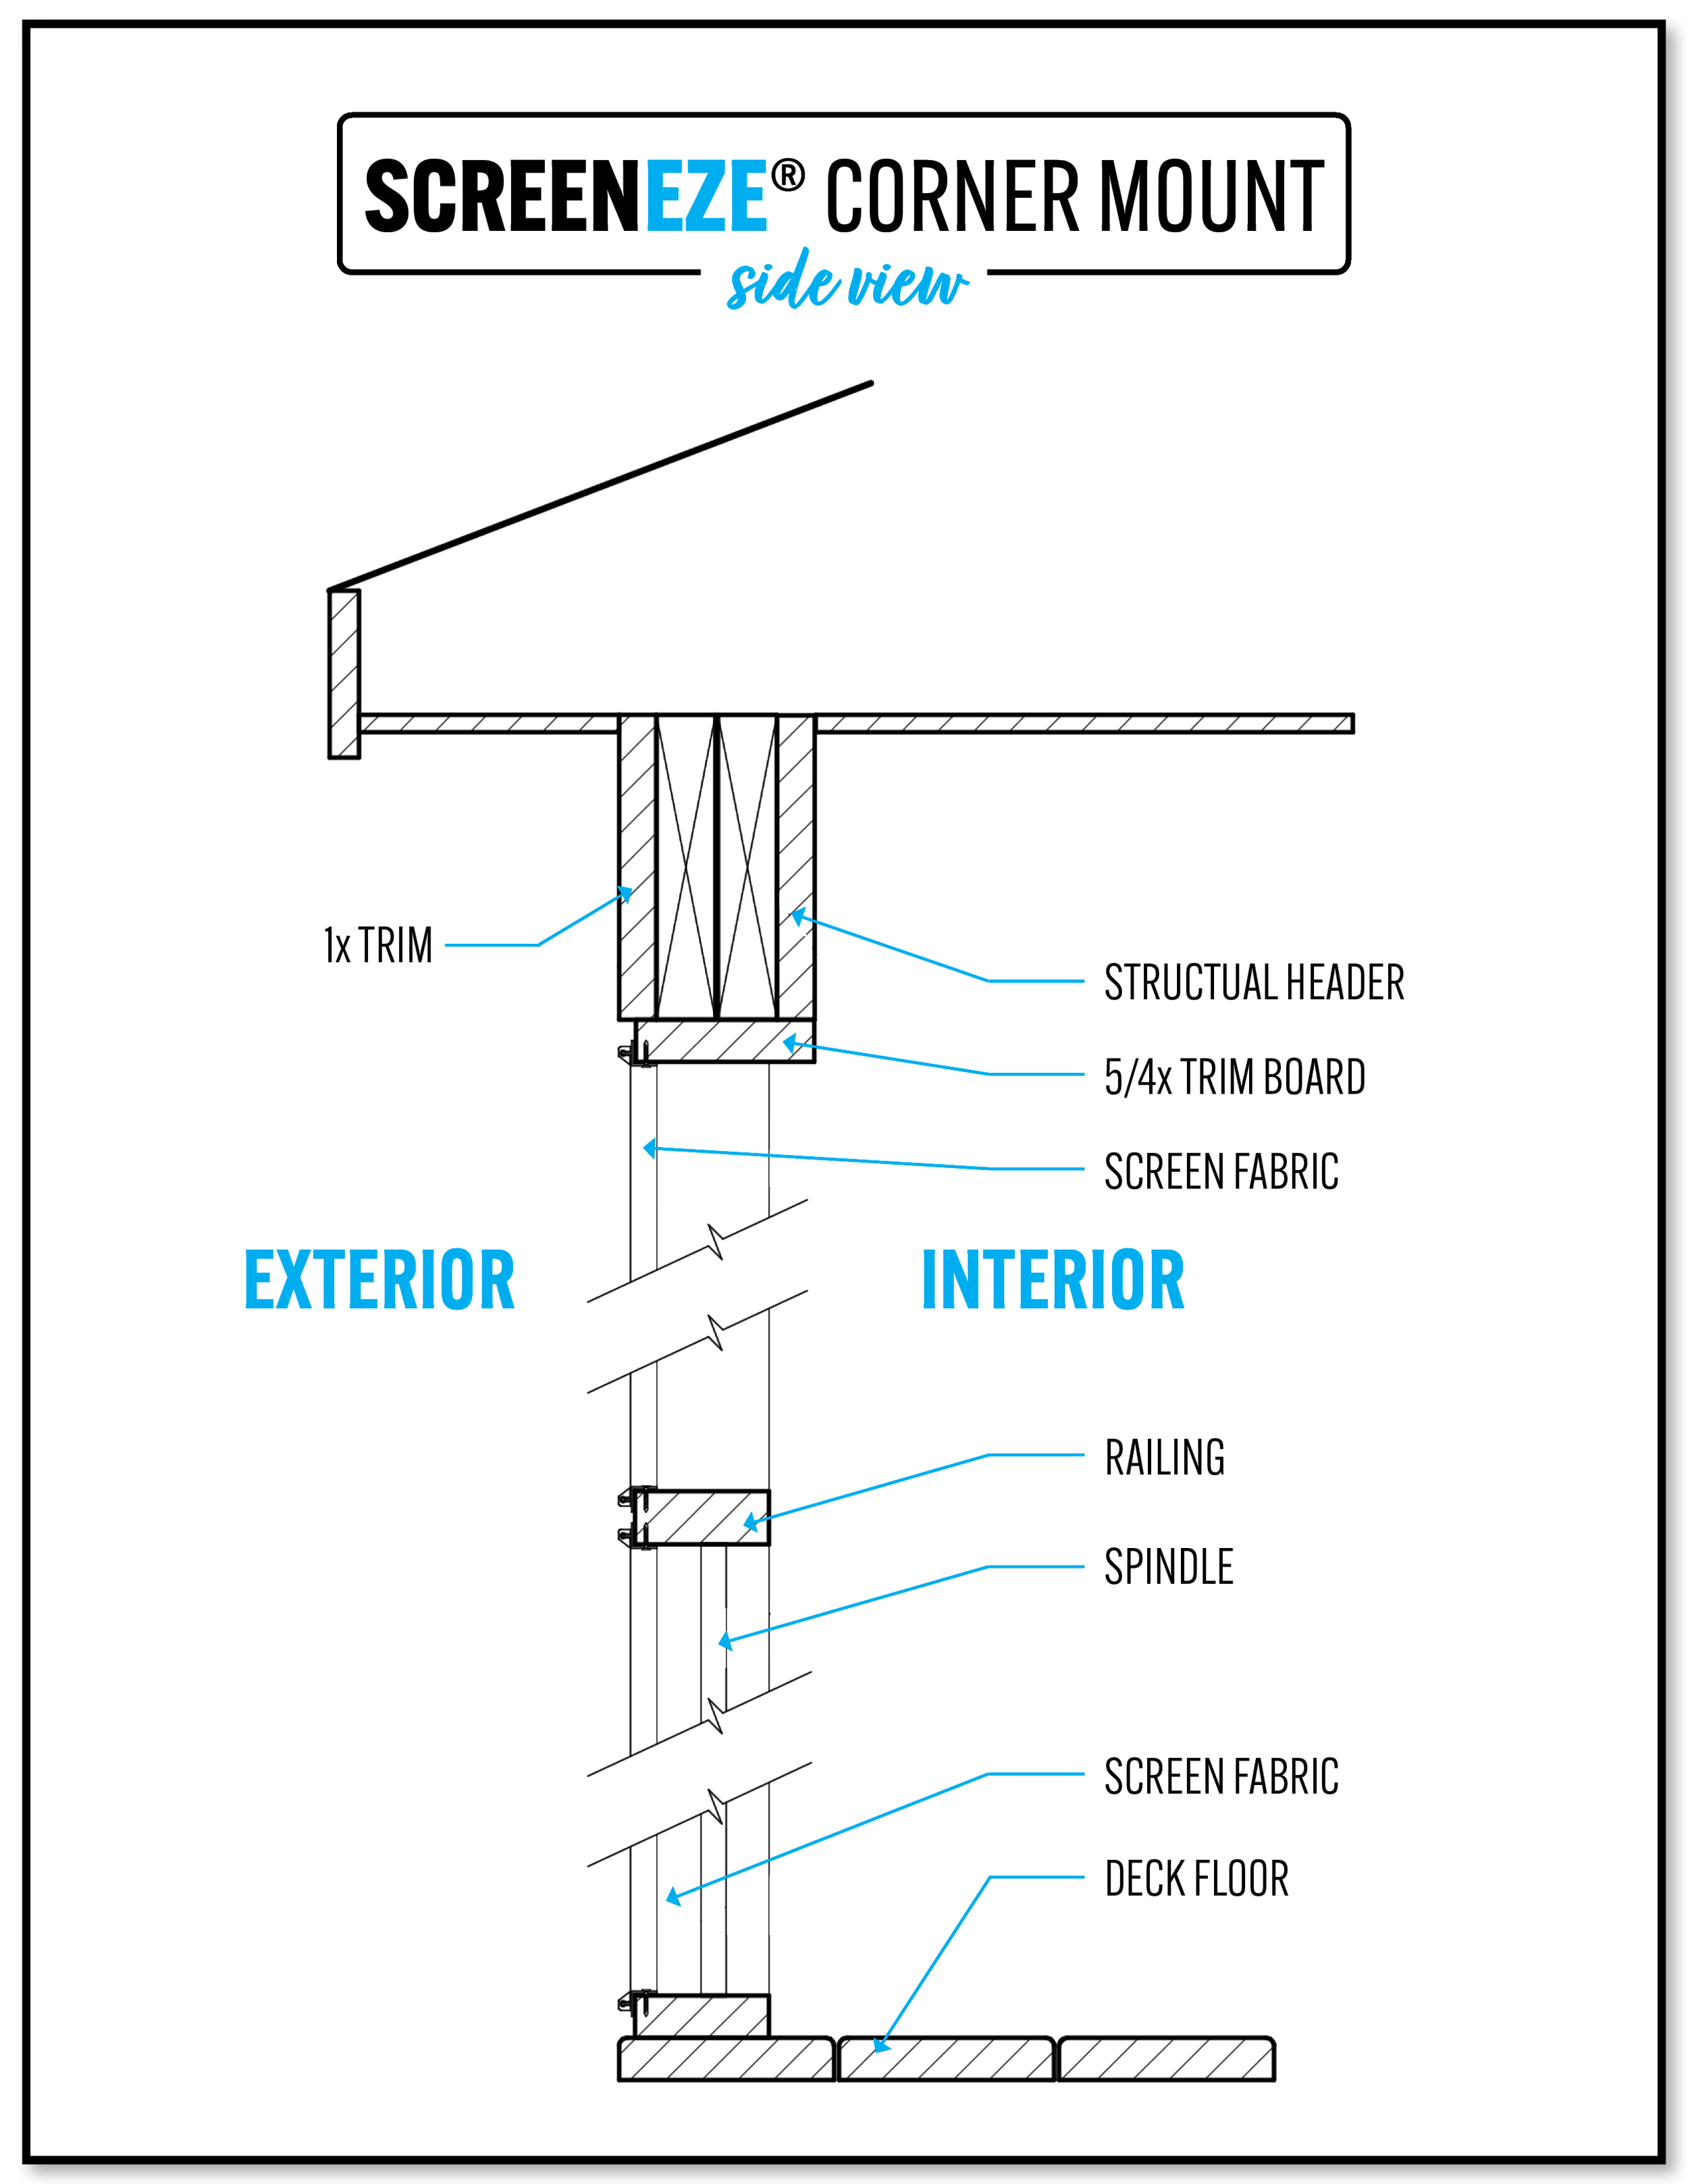
SCREENEZE Corner Mount
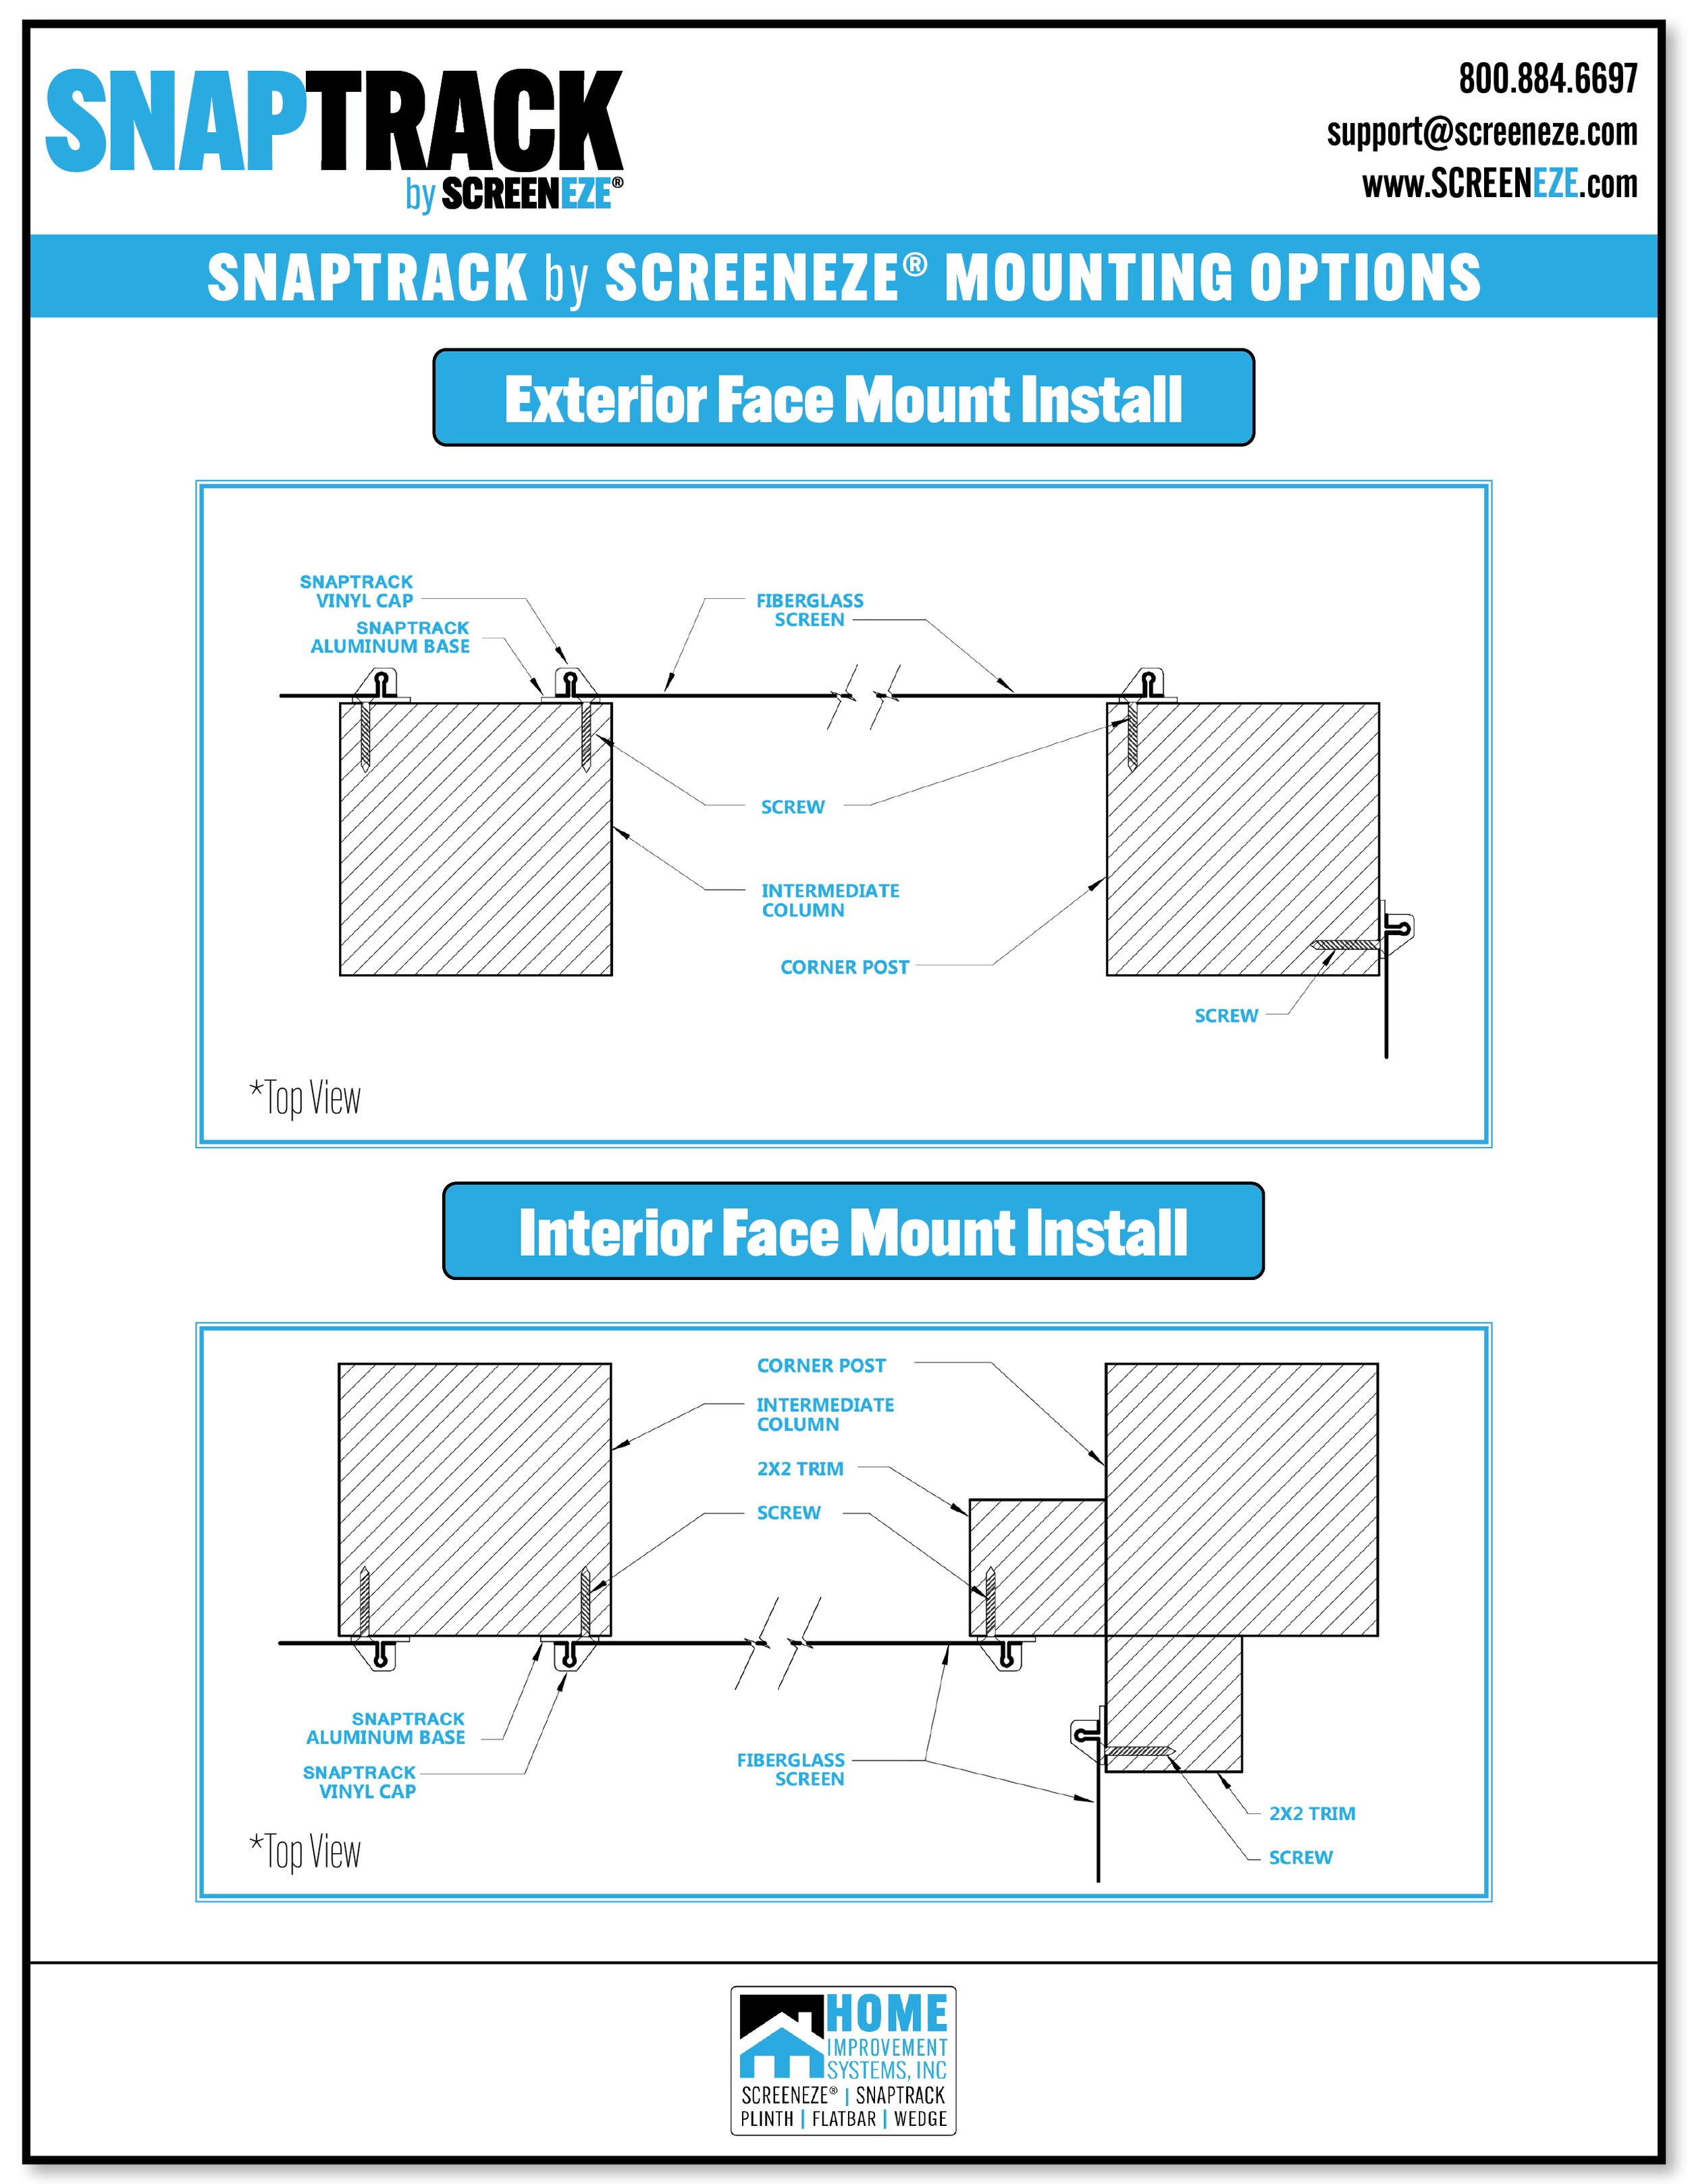
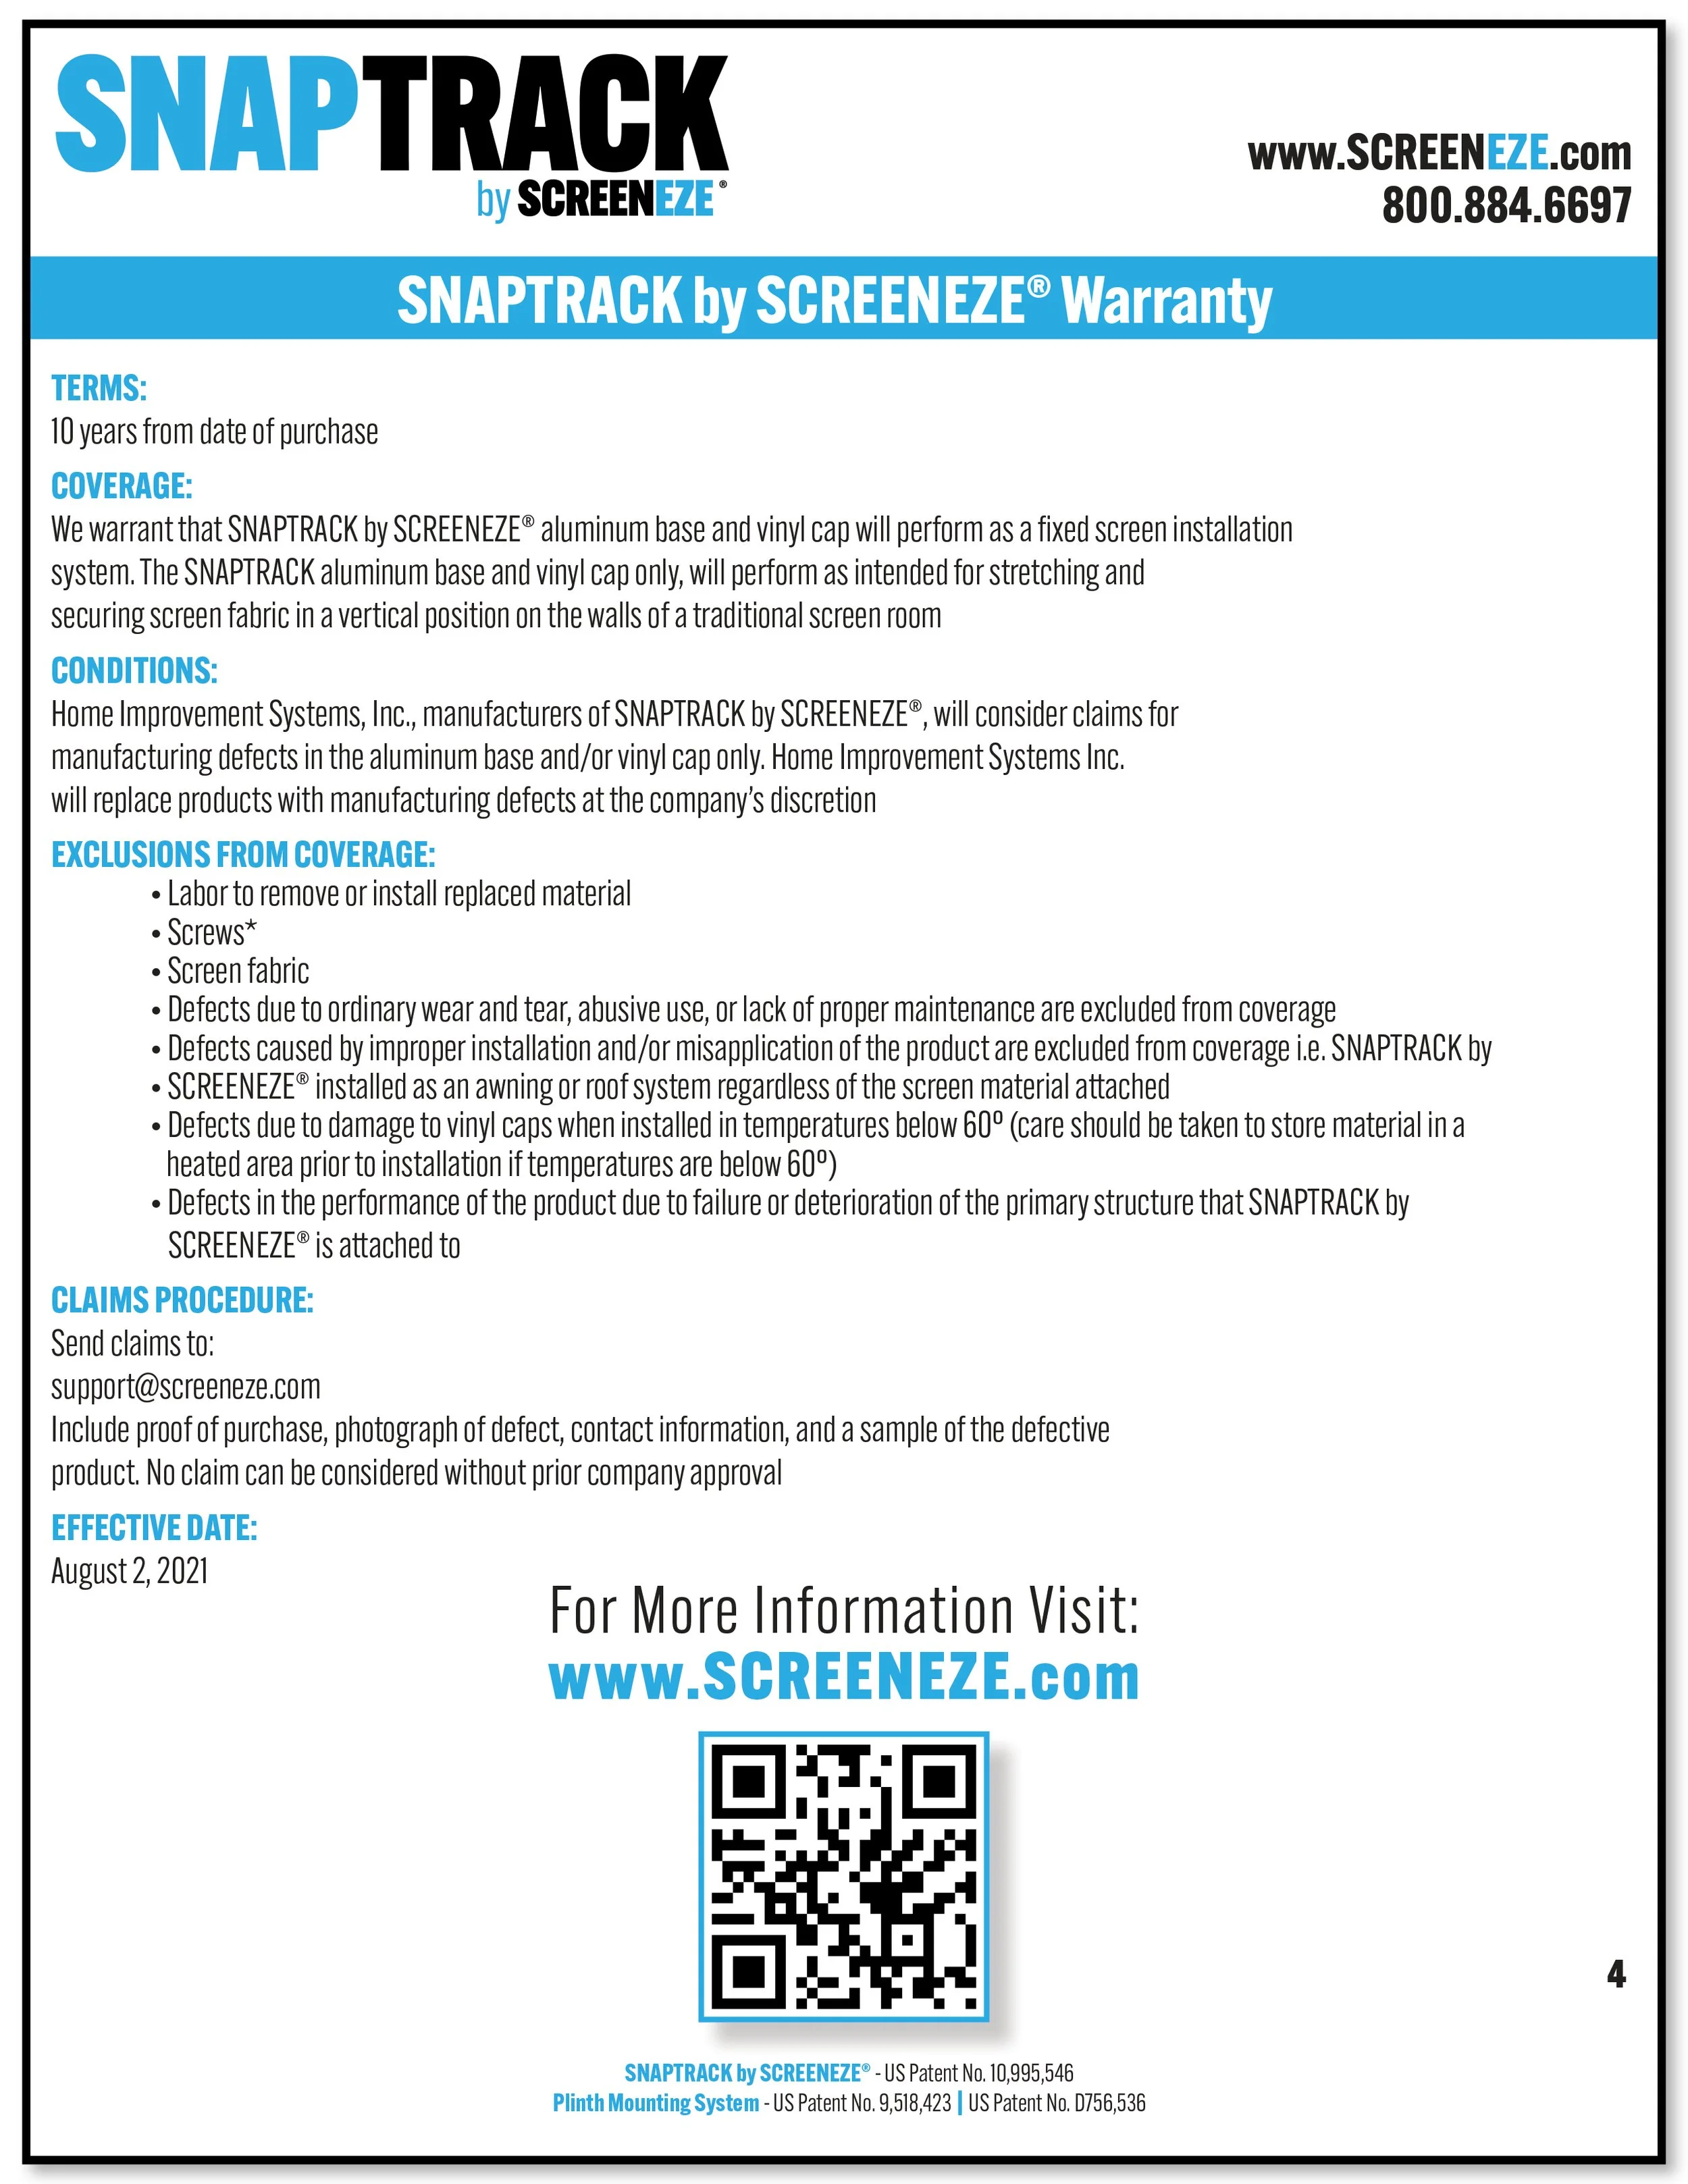
SNAPTRACK Face Mount
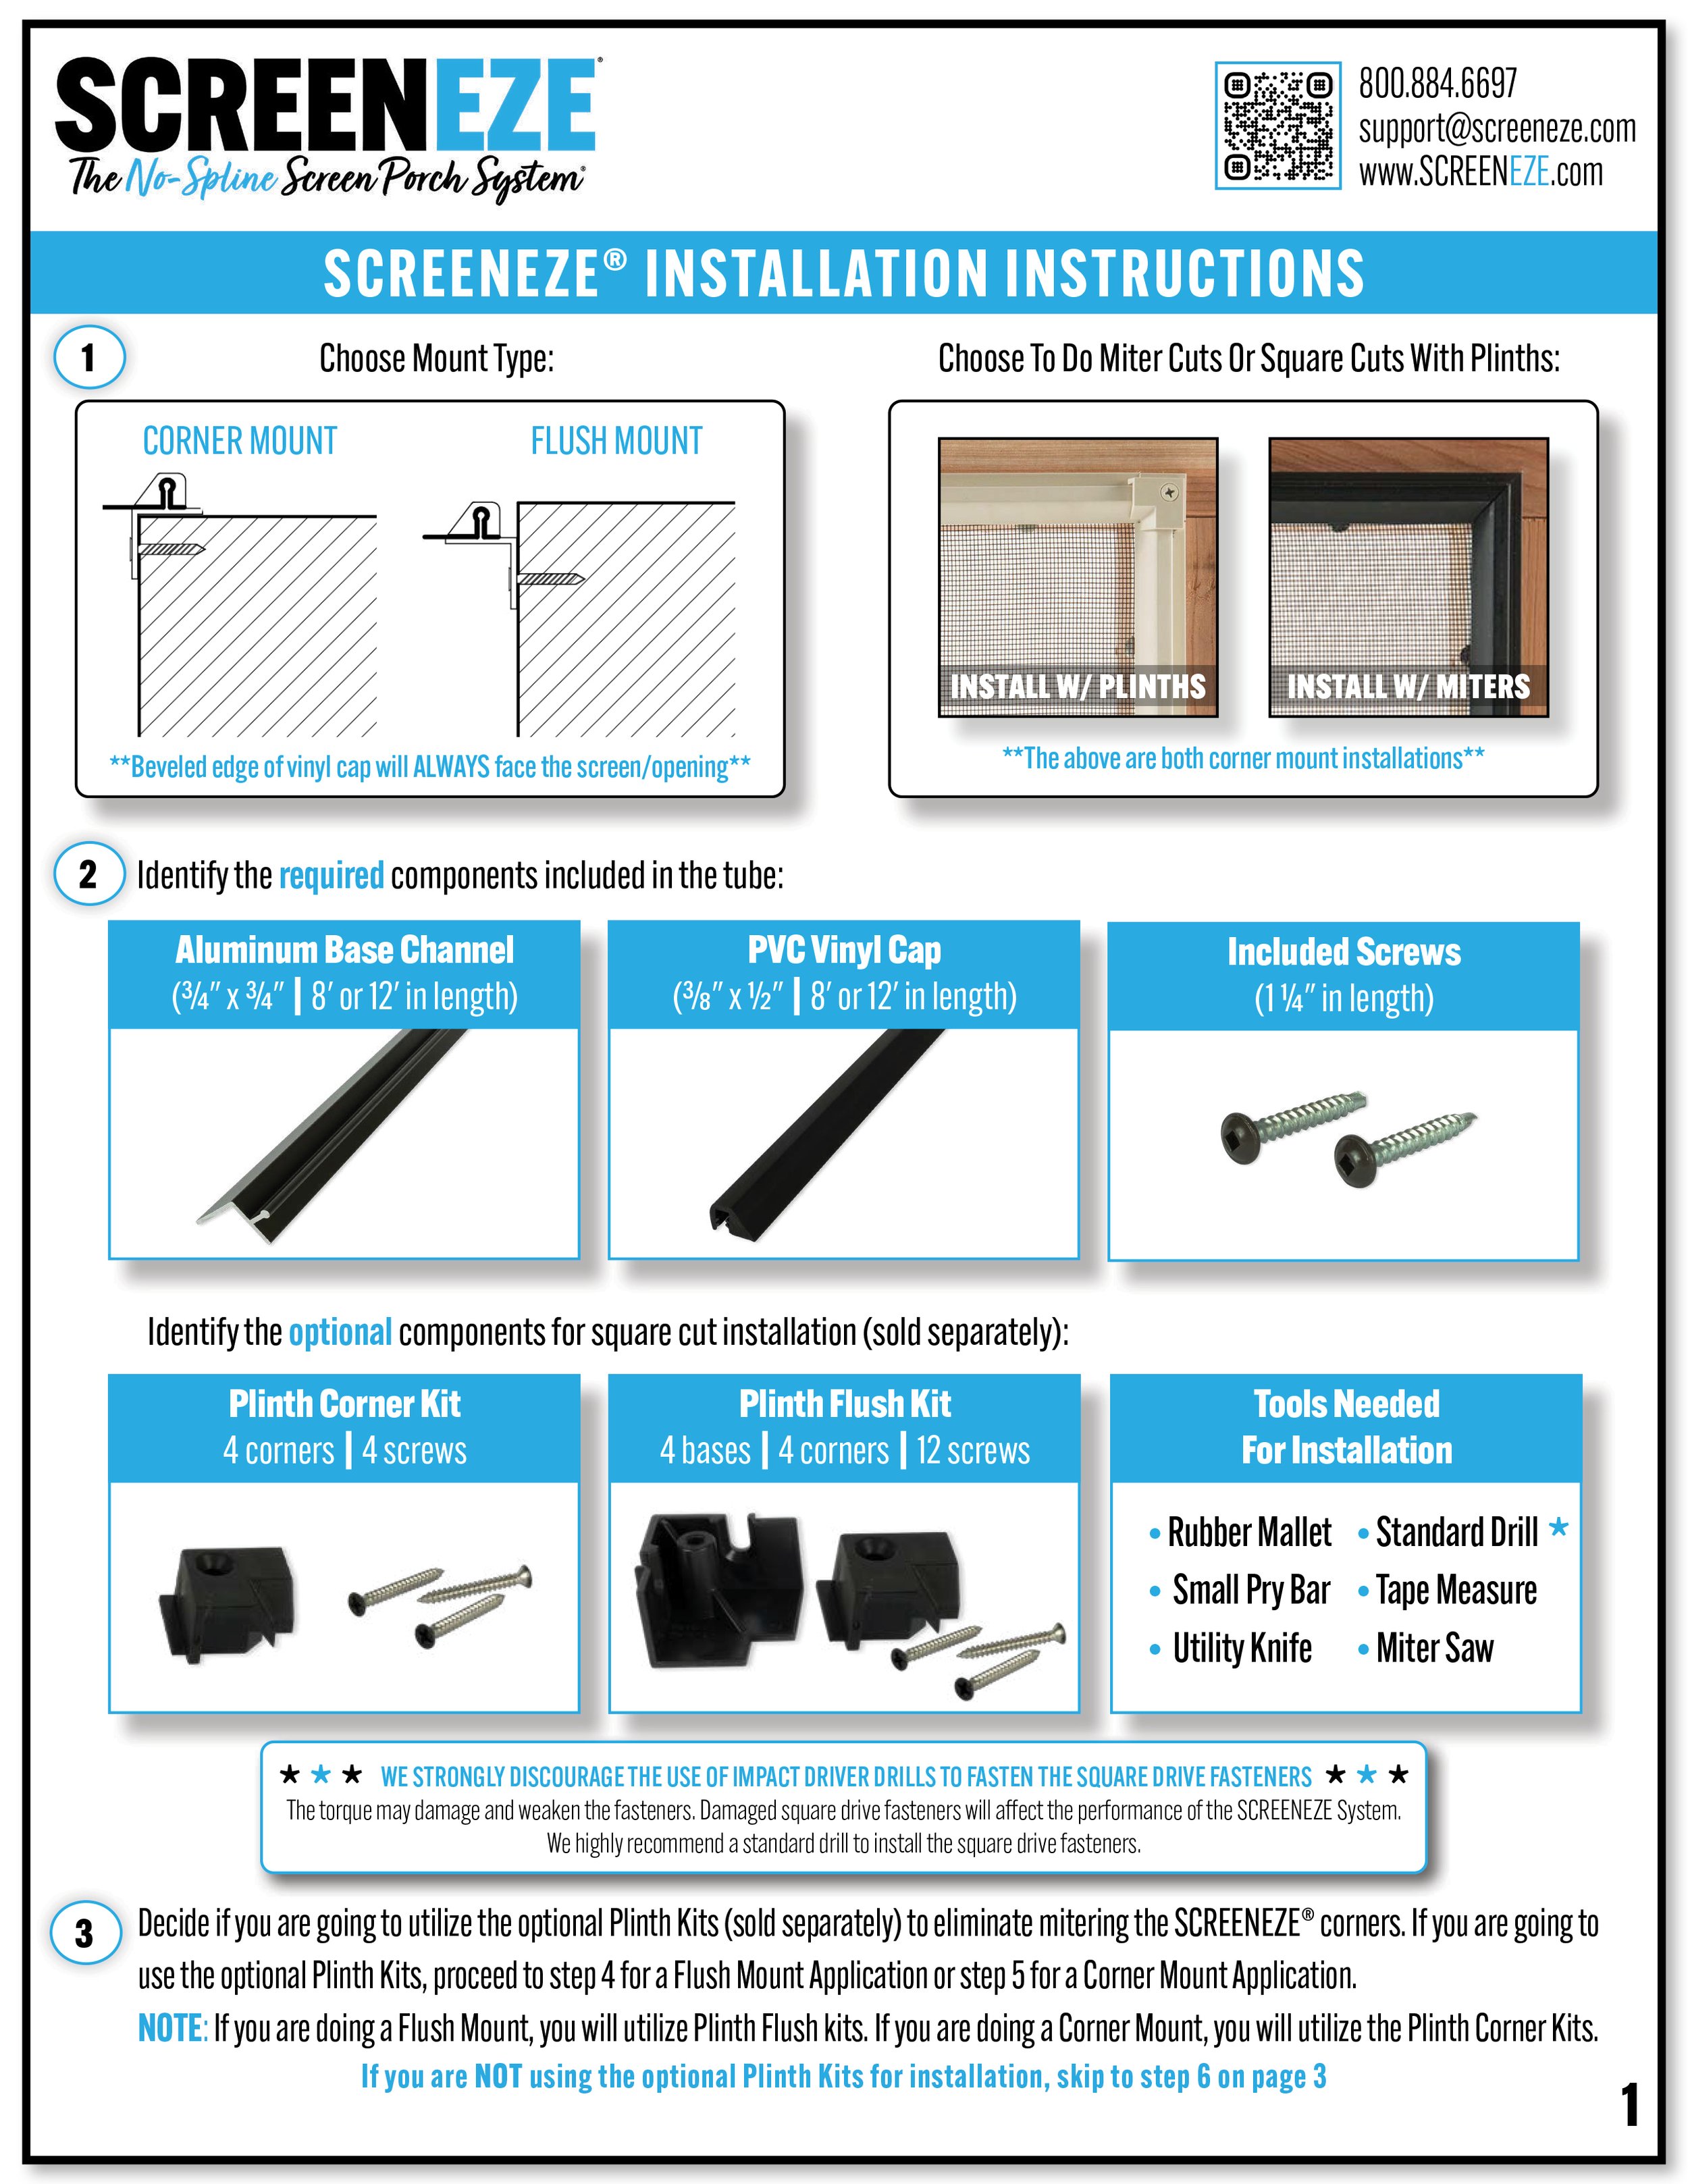
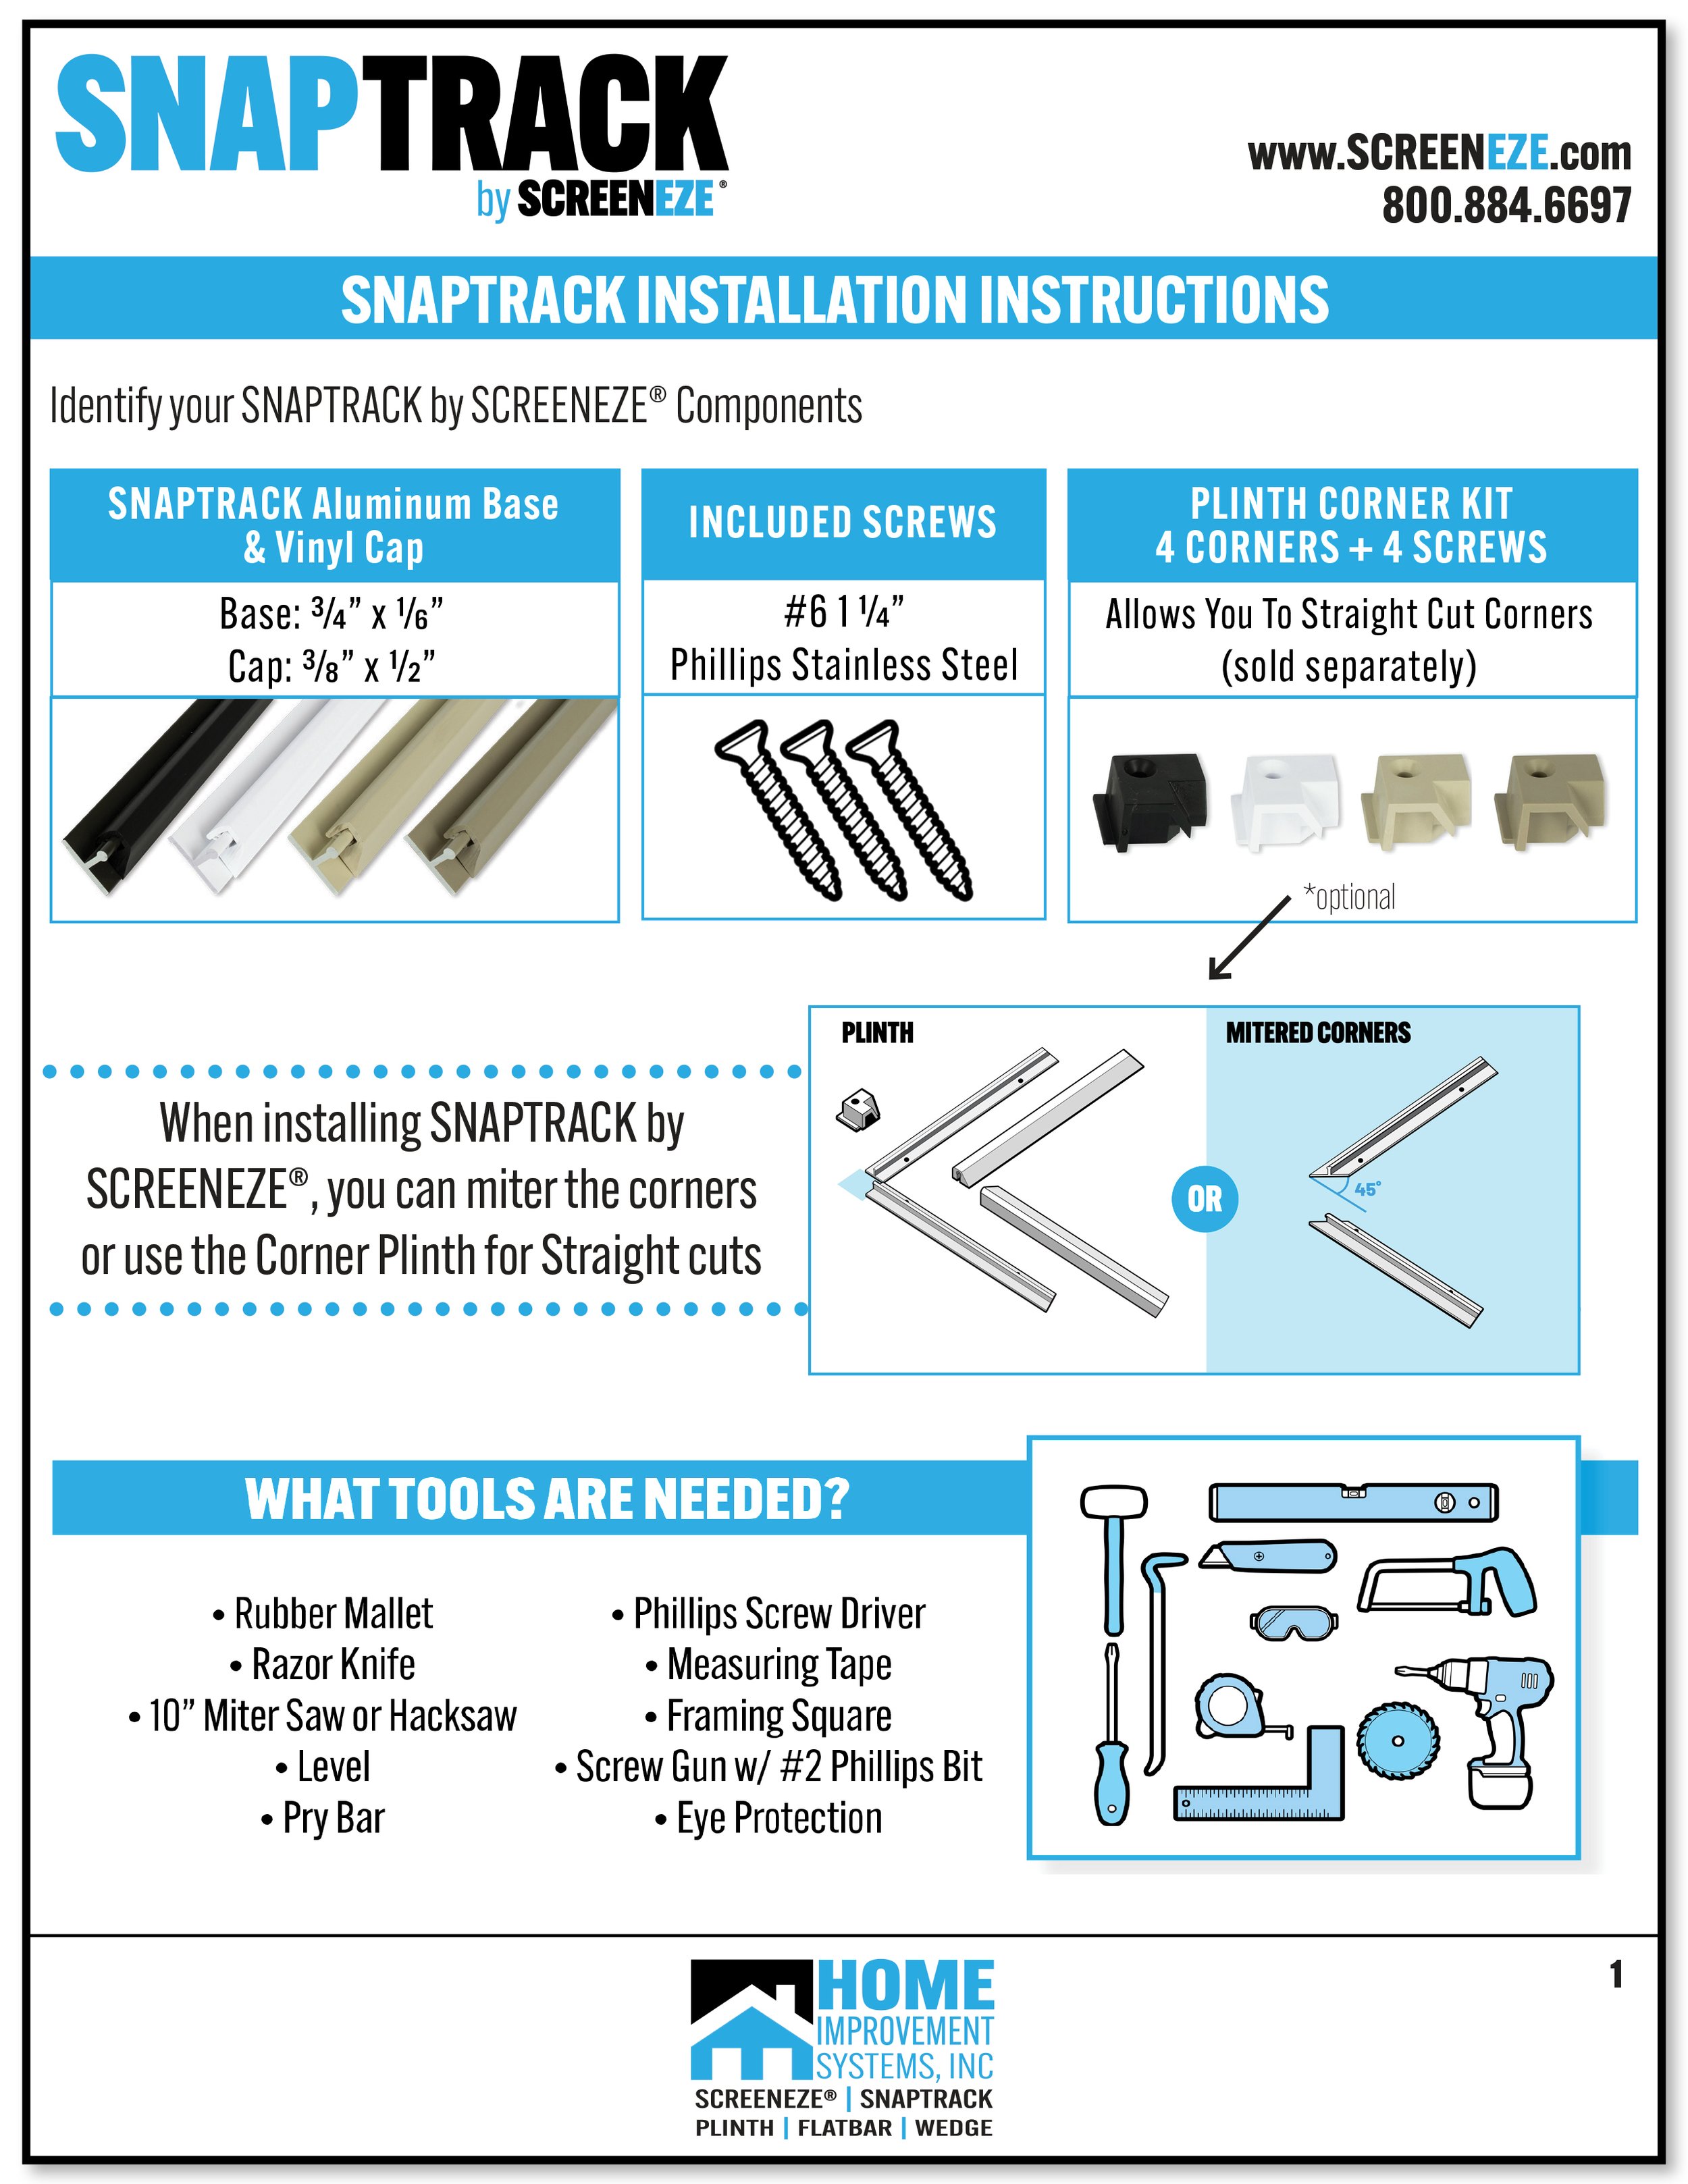
Cutting Options:
Miter Cuts
Straight Cuts w/ Plinth Kits
-
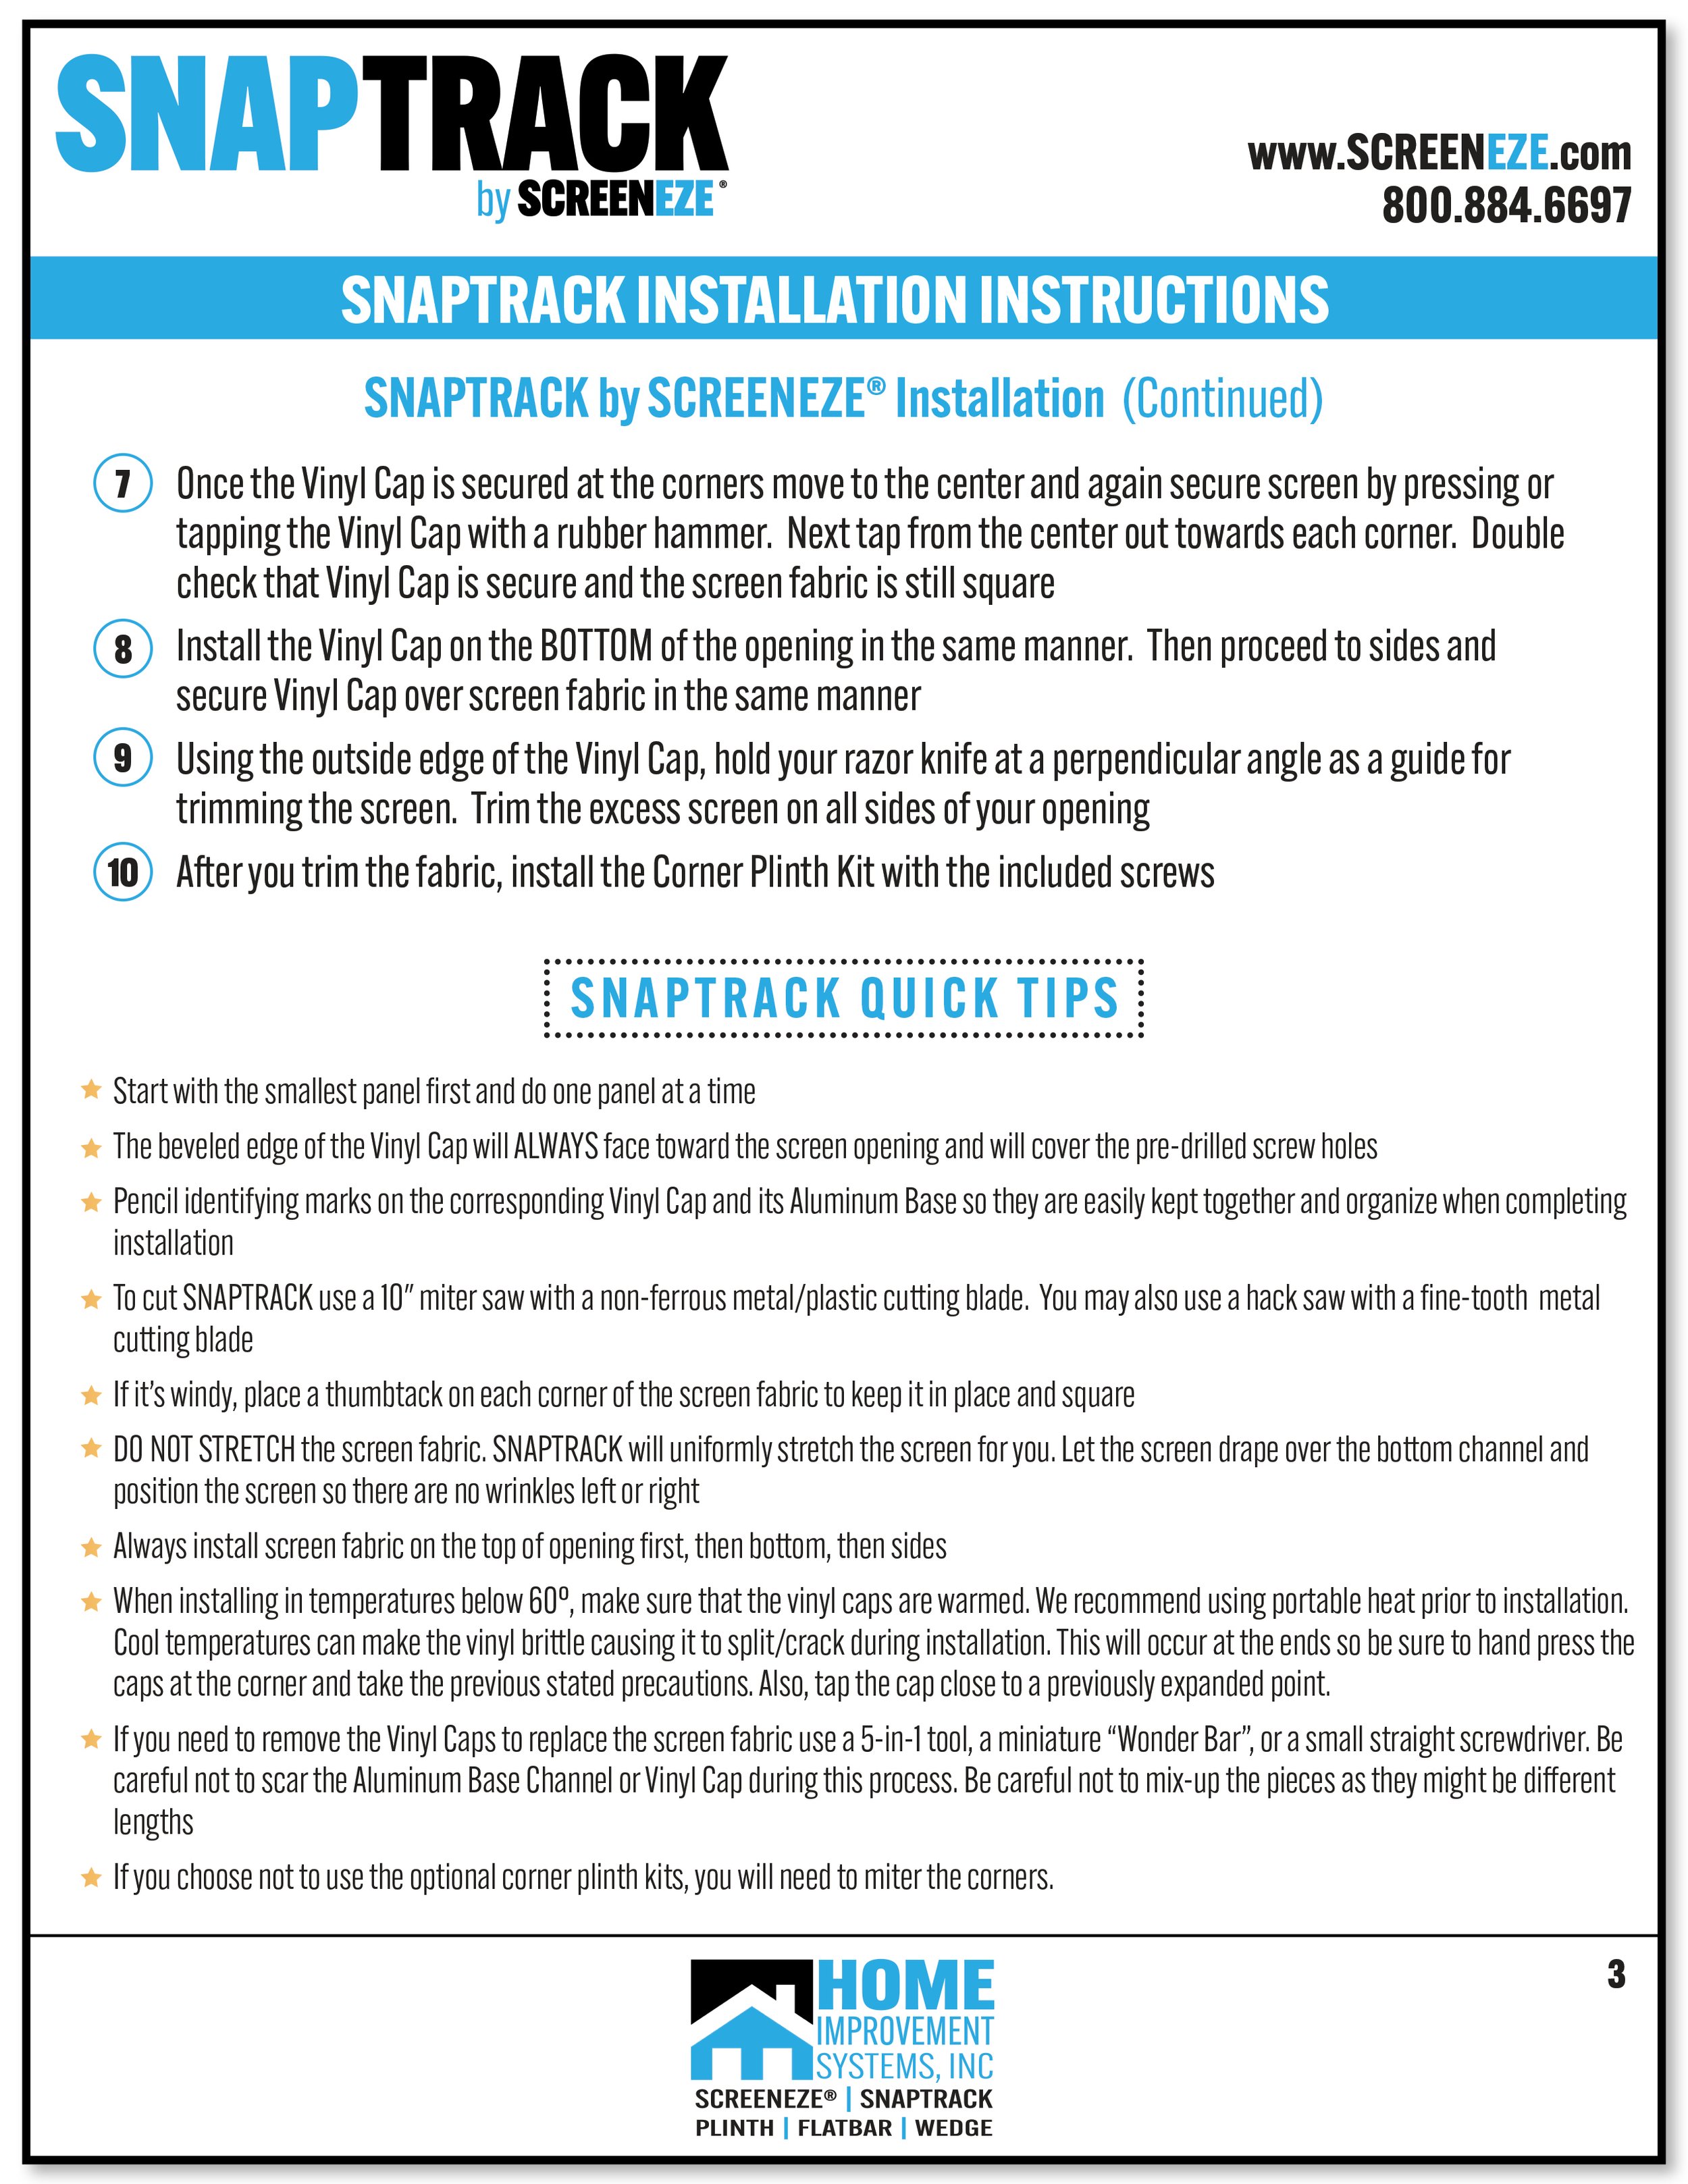
The bevel side of the vinyl cap will always point/face towards the screen fabric.
Use a 3” piece of vinyl cap as a “clip” for holding the screen.
Trisodium phosphate is a good cleaning product for screen fabric.
A washer can be used under SCREENEZE on concrete to let water express.
On rectangular openings, always start installing caps on TOP first .
A painter's tool (5-in-one) is best for removing vinyl and is available on our online store!
Keep the fabric attached to the roll, place vertically, and it will hold the screen up.
Measure openings during the quotes. Then, cut and pre-drill SCREENEZE before getting to the job site.
Always make sure to mark and/or label your pieces so you know what opening they correspond to.
For Bronze, a silver sharpie works best for marking.
Label caps: top, bottom, left & right.
Label openings: 1, 2, 3, 4, 5, etc…
Measure TWICE and cut ONCE!
-
We strongly discourage the use of impact driver drills to fasten the square drive fasteners (included with the SCREENEZE System). The torque may damage and weaken the fasteners. Damaged square drive fasteners will affect the performance of the SCREENEZE System. We highly recommend a standard drill to install the square drive fasteners.
-
When installing a trapezoid or an arch, always put the bottom horizontal on first. By doing this, it will stop it from walking during installation.
Install the bottom first, then the top of the horizontal, then lastly the sides.
With a standard rectangular or square opening, you should always do top, bottom, and then sides.
-
Always check the saw blade for missing or crooked teeth before starting any cuts.
Cut the vinyl and metal together, or use the new multi-angle miter shears (available on our website) for the vinyl.
We recommend a 10” miter saw, specifically with the Lenox 10” 52 Tooth Continuous Carbide Circular Saw Blade.
Never cut over a rough textured surface, like concrete or brick. It’s not easy to clean up and makes for an unhappy home owner.
Use a jig or a 2x4 along the bottom of the miter saw.
Using painter’s tape while cutting helps to prevent bucking.
Hold and/or grip the base & cap firmly while cutting.
download cutting tips
-
SNAPTRACK aluminum bases are already pre-drilled.
If you are using SCREENEZE regularly, you would benefit from using a drill press.
A drill press with premarked measurements at 2” and 10” makes for a clean install.
We strongly discourage the use of impact driver drills. The torque may damage and weaken the fasteners.
We highly recommend a standard drill to install the square drive fasteners.
Against metal, it’s best to use TEK screws instead of the included SCREENEZE screws.
-
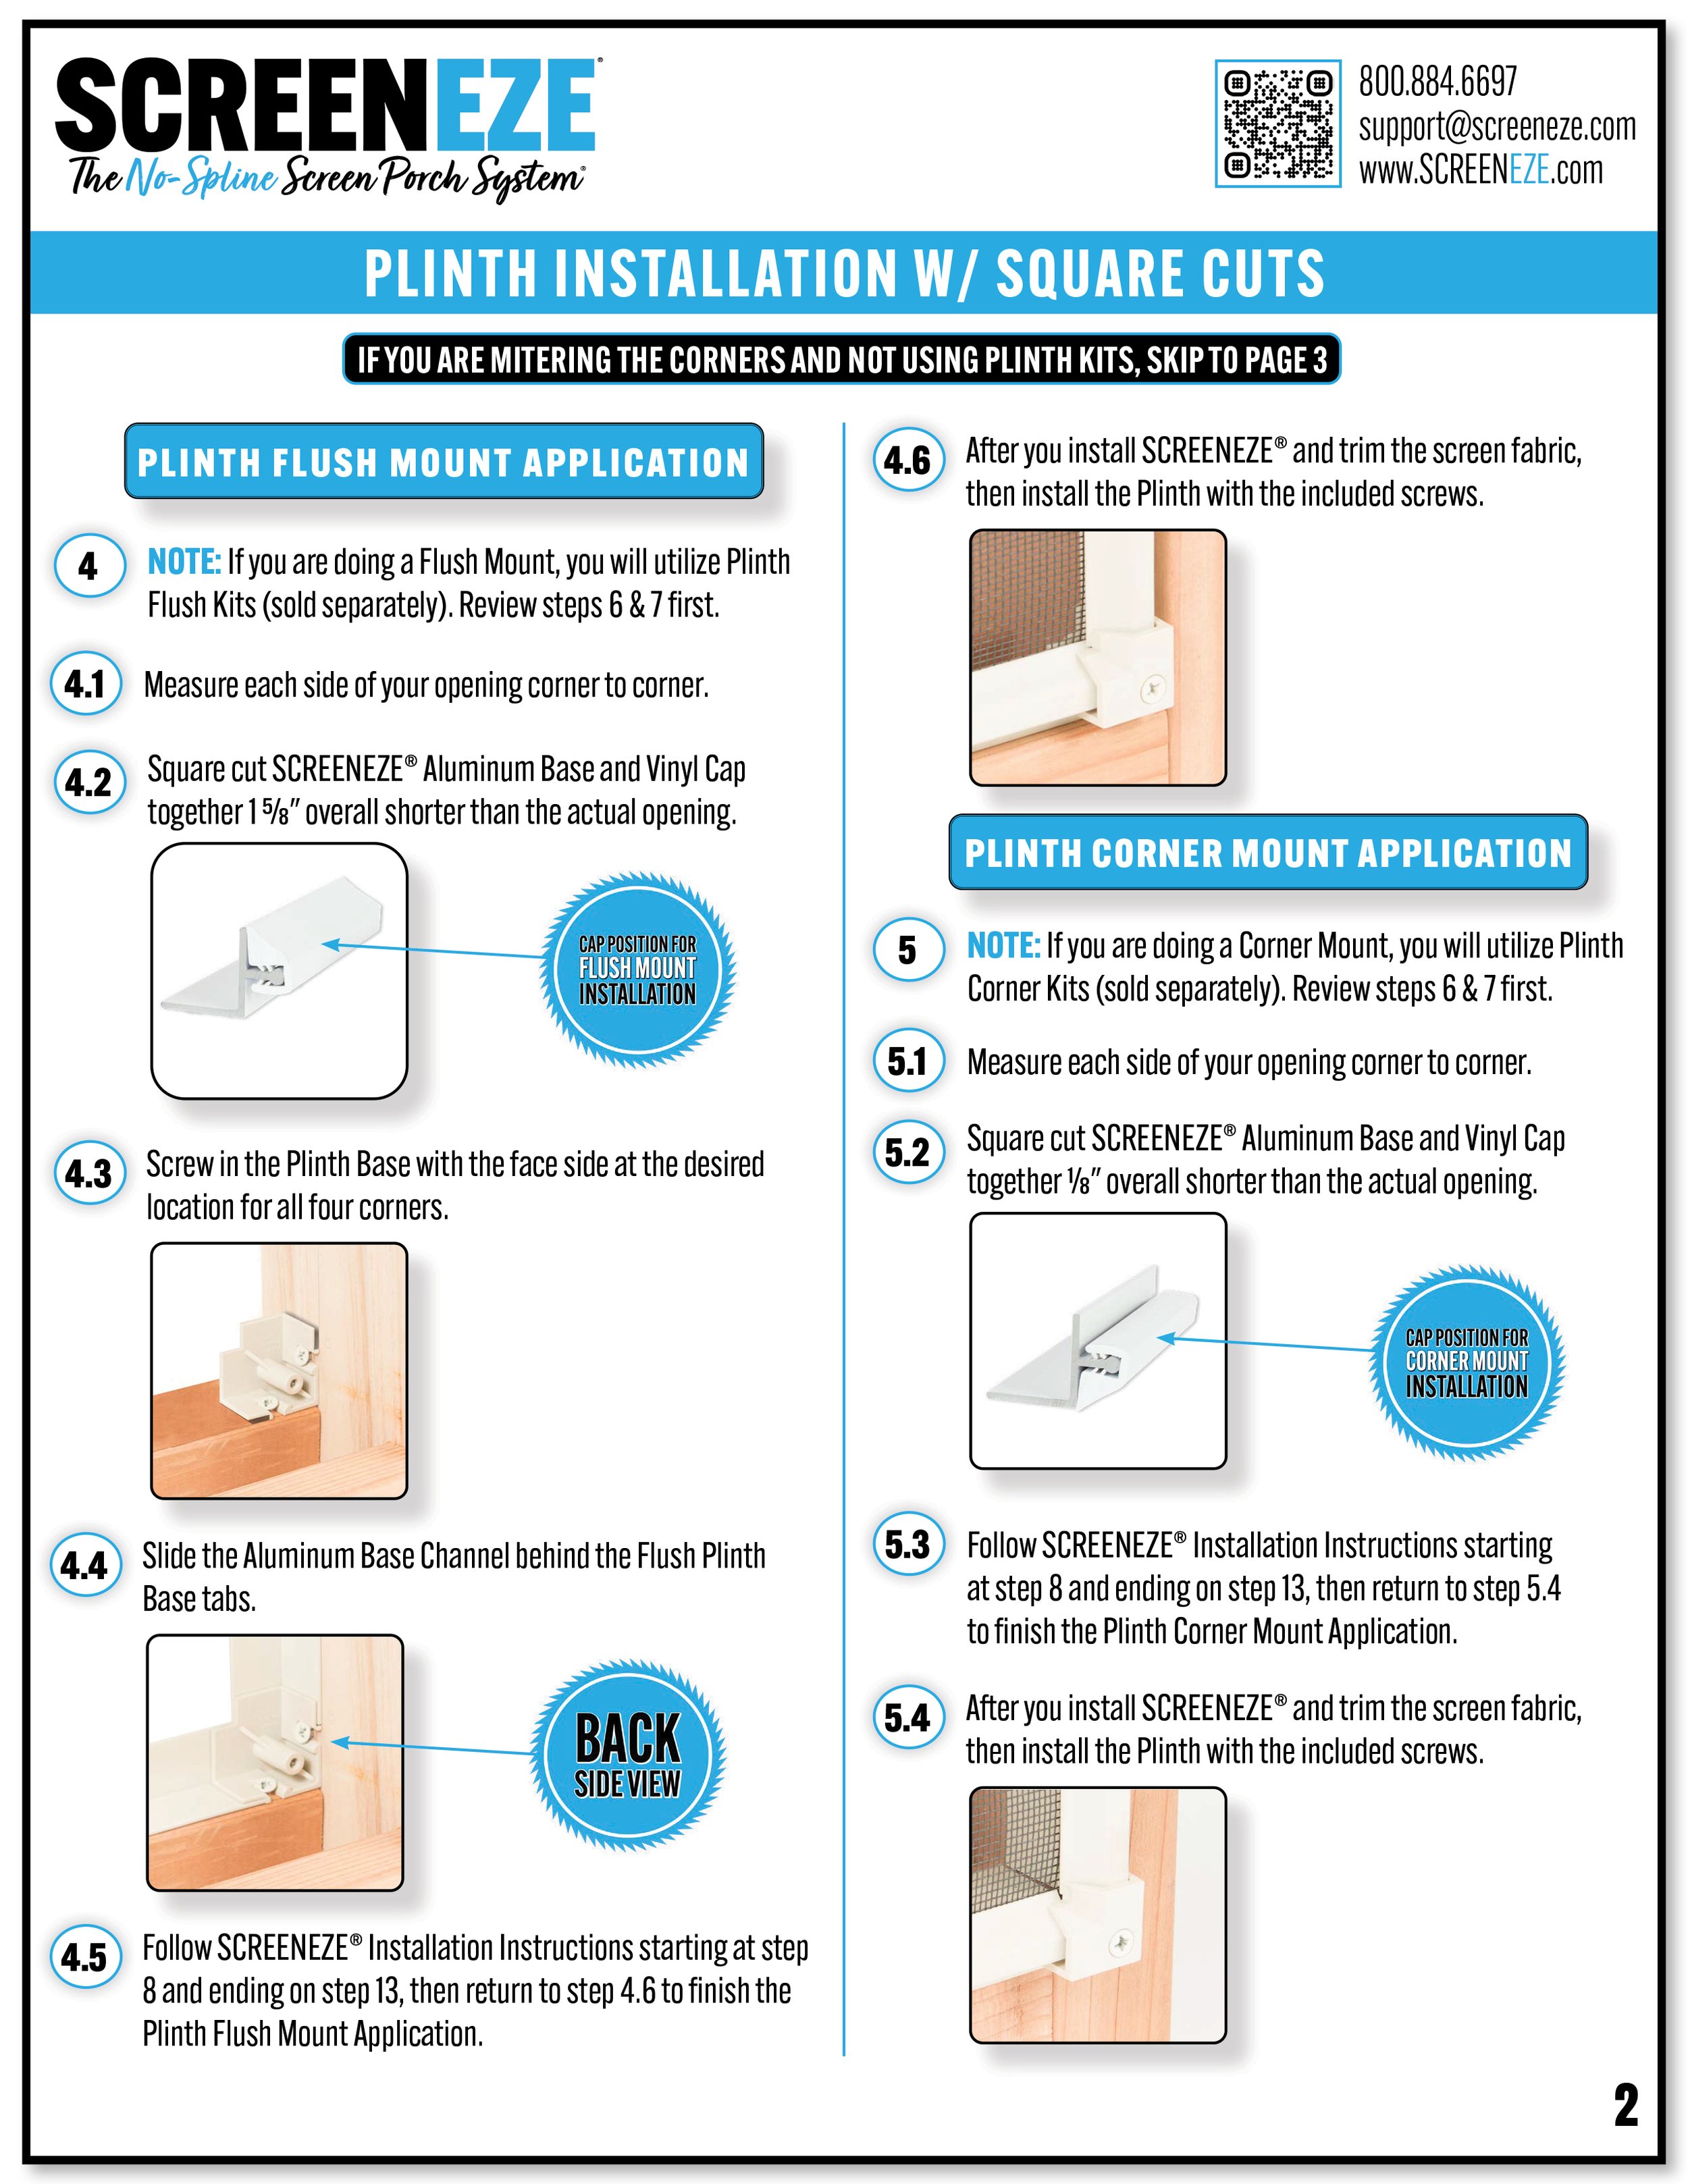
Place the Aluminum Base ¾” from the farthest outside point for an easier install.
Using the Flush Plinth kits will help hold the SCREENEZE aluminum base in place.
Use a wooden block with the rubber mallet when hands are unable to reach the cap.
-
The adjacent glide side must be free of protruding obstructions, including but not limited to: Corner-mounted SCREENEZE installation and Face-mounted SNAPTRACK.
Flush-mounted SCREENEZE is the best installation method when panels align on the same side as the door. This allows for the door to glide smoothly past the installed SCREENEZE panels, avoiding obstructions.
Be aware of any existing floor sloping and take that into consideration so as not to impact the functionality of the door.
-
Deciding how much you need is pretty straight forward. Look at each opening and decide how many pieces of 8’ or 12’ will work best, then add them up. Keep in mind, you can splice pieces together for longer runs.
For example:
Your opening is 7’x 10’:
You could use two pieces of 8’ on the 7’ runs and then two 12’ pieces for the 10’ runs. Will you have waste? Yes, you will. You can splice the smaller pieces together if you prefer.
Make sure that you have at least 2” - 4” of excess screen fabric for each opening. You will trim it off at the end.
If you are using Plinth Kits, order one per opening. If you have 5 openings, order 5 plinth kits.
Order Flush Plinth Kits if you are doing a SCREENEZE Flush Mount.
Order Corner Mount Kits if you are doing a SCREENEZE corner mount or SNAPTRACK face mount.
SCREENEZE® INSTALLATION INSTRUCTIONS


SCREENEZE® FLUSH & CORNER MOUNTING DETAILS


SNAPTRACK INSTALLATION INSTRUCTIONS & MOUNTING

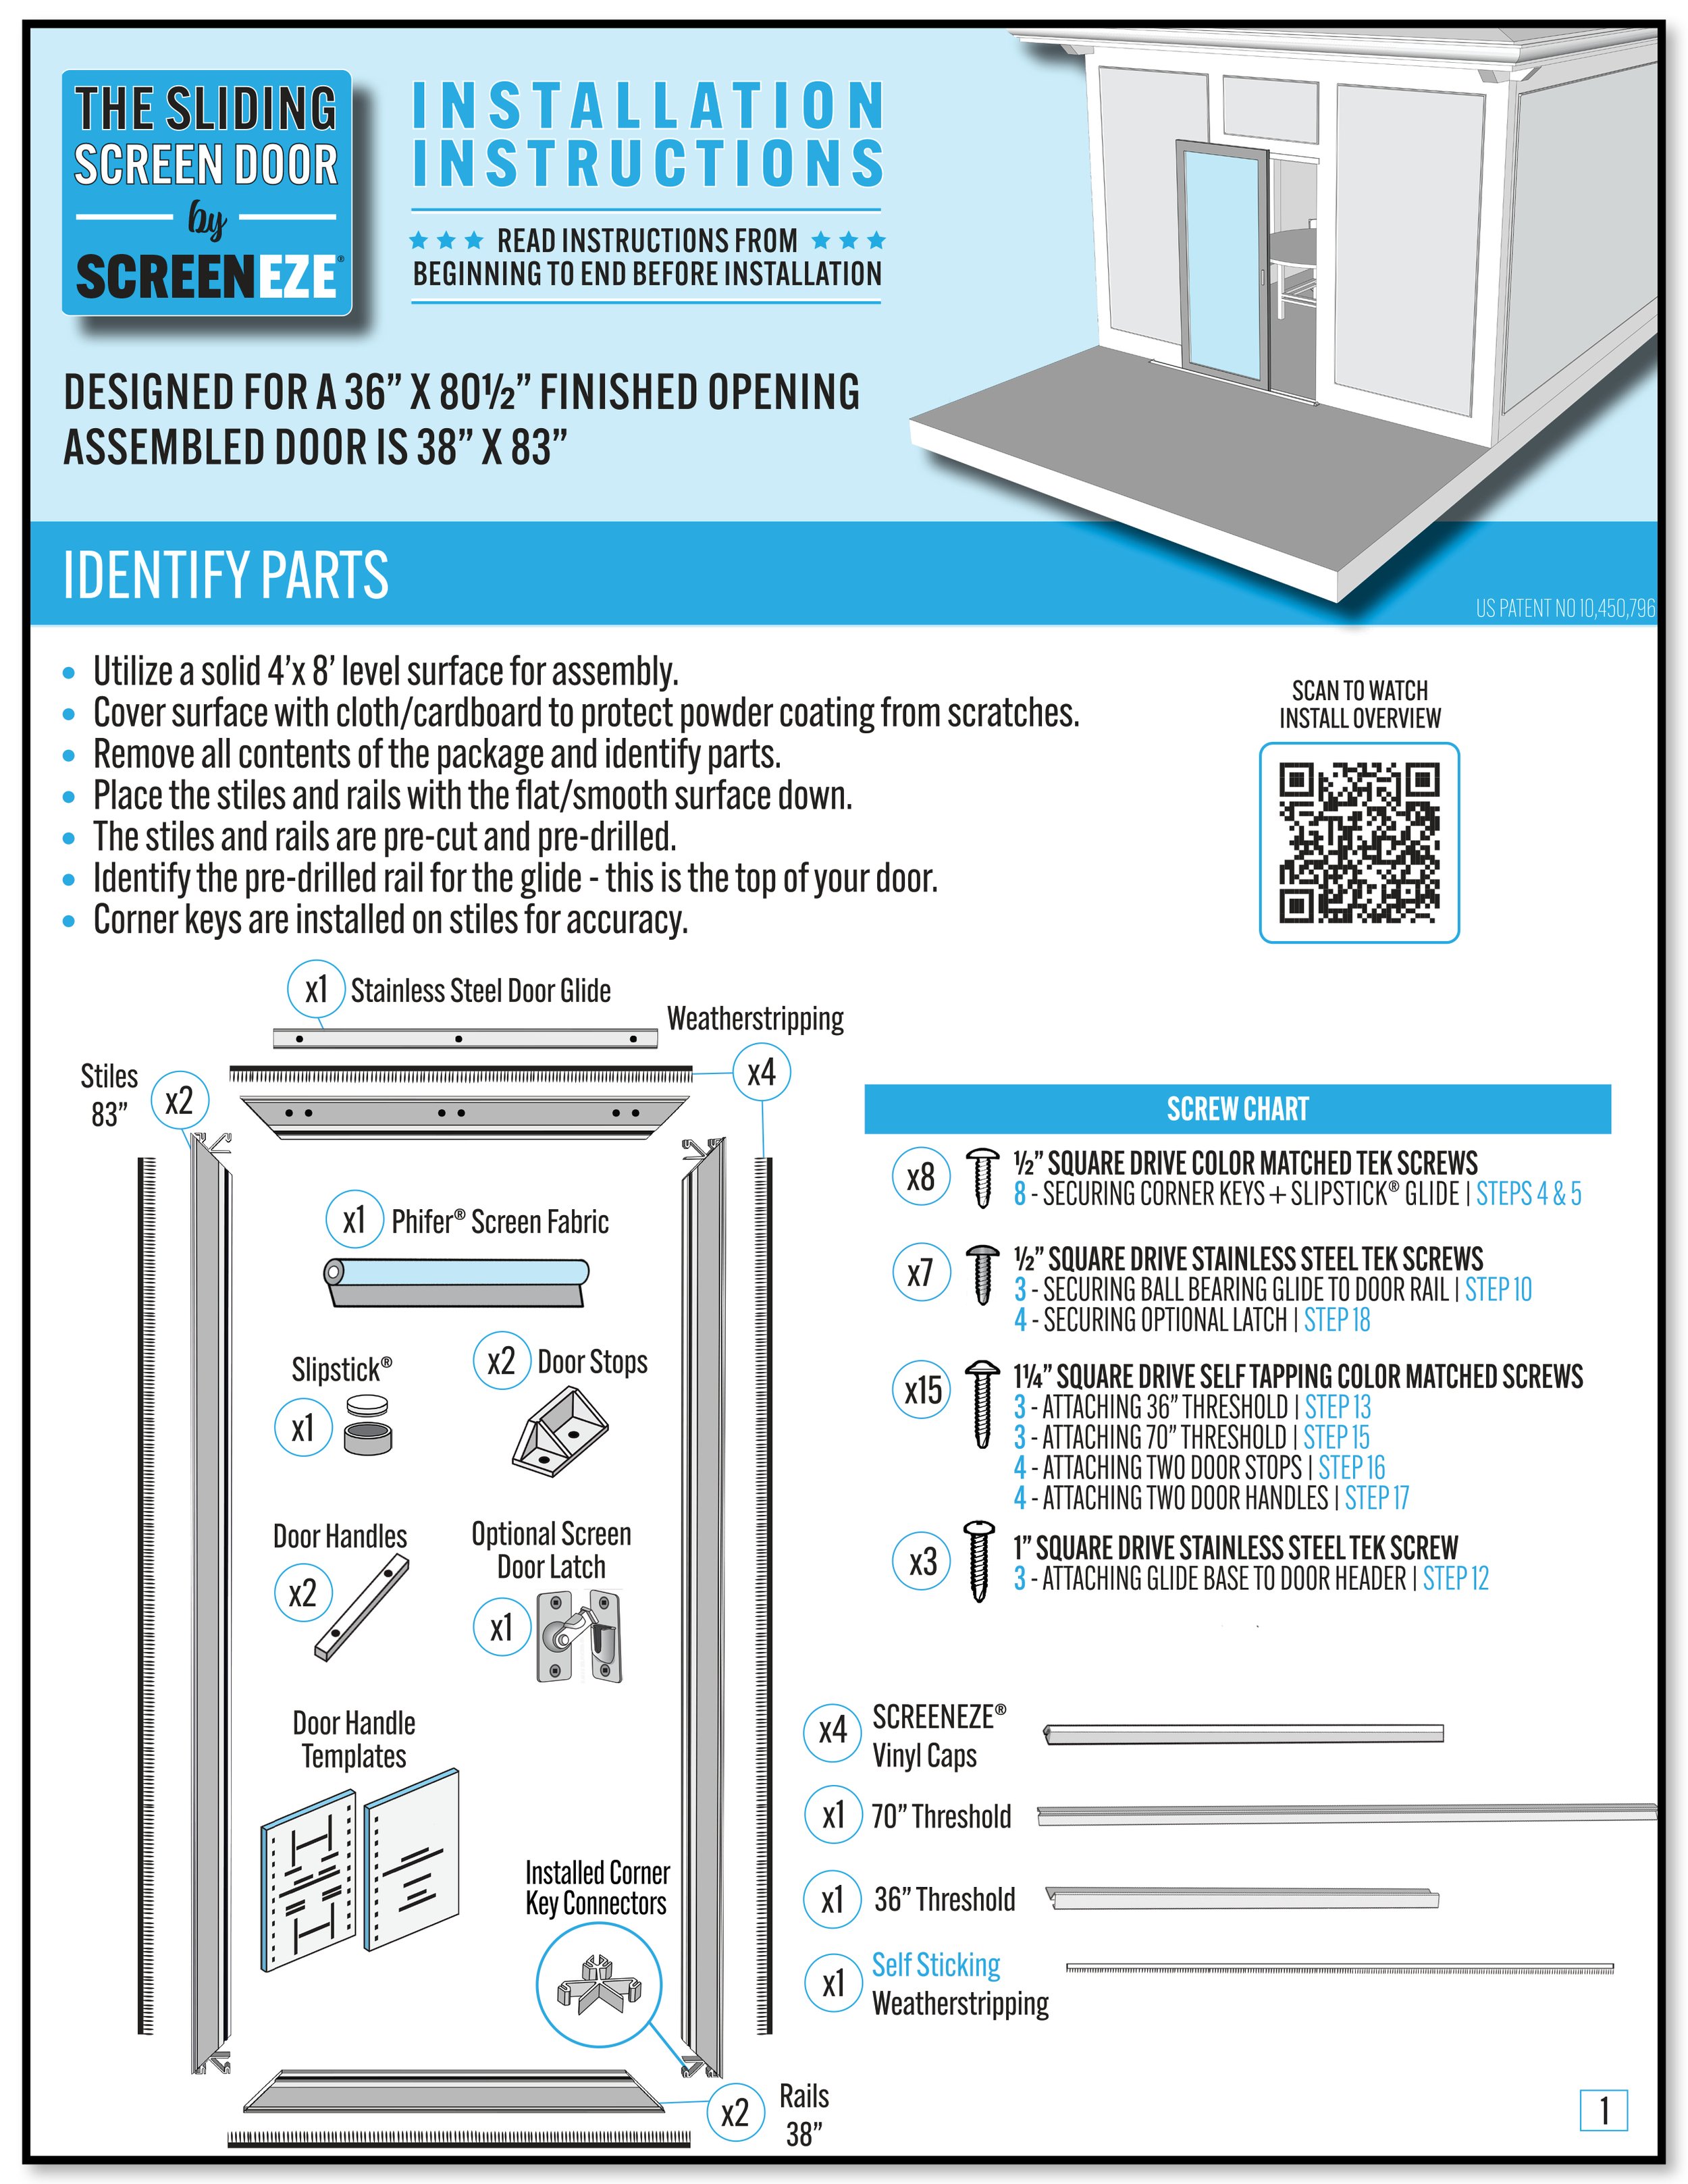
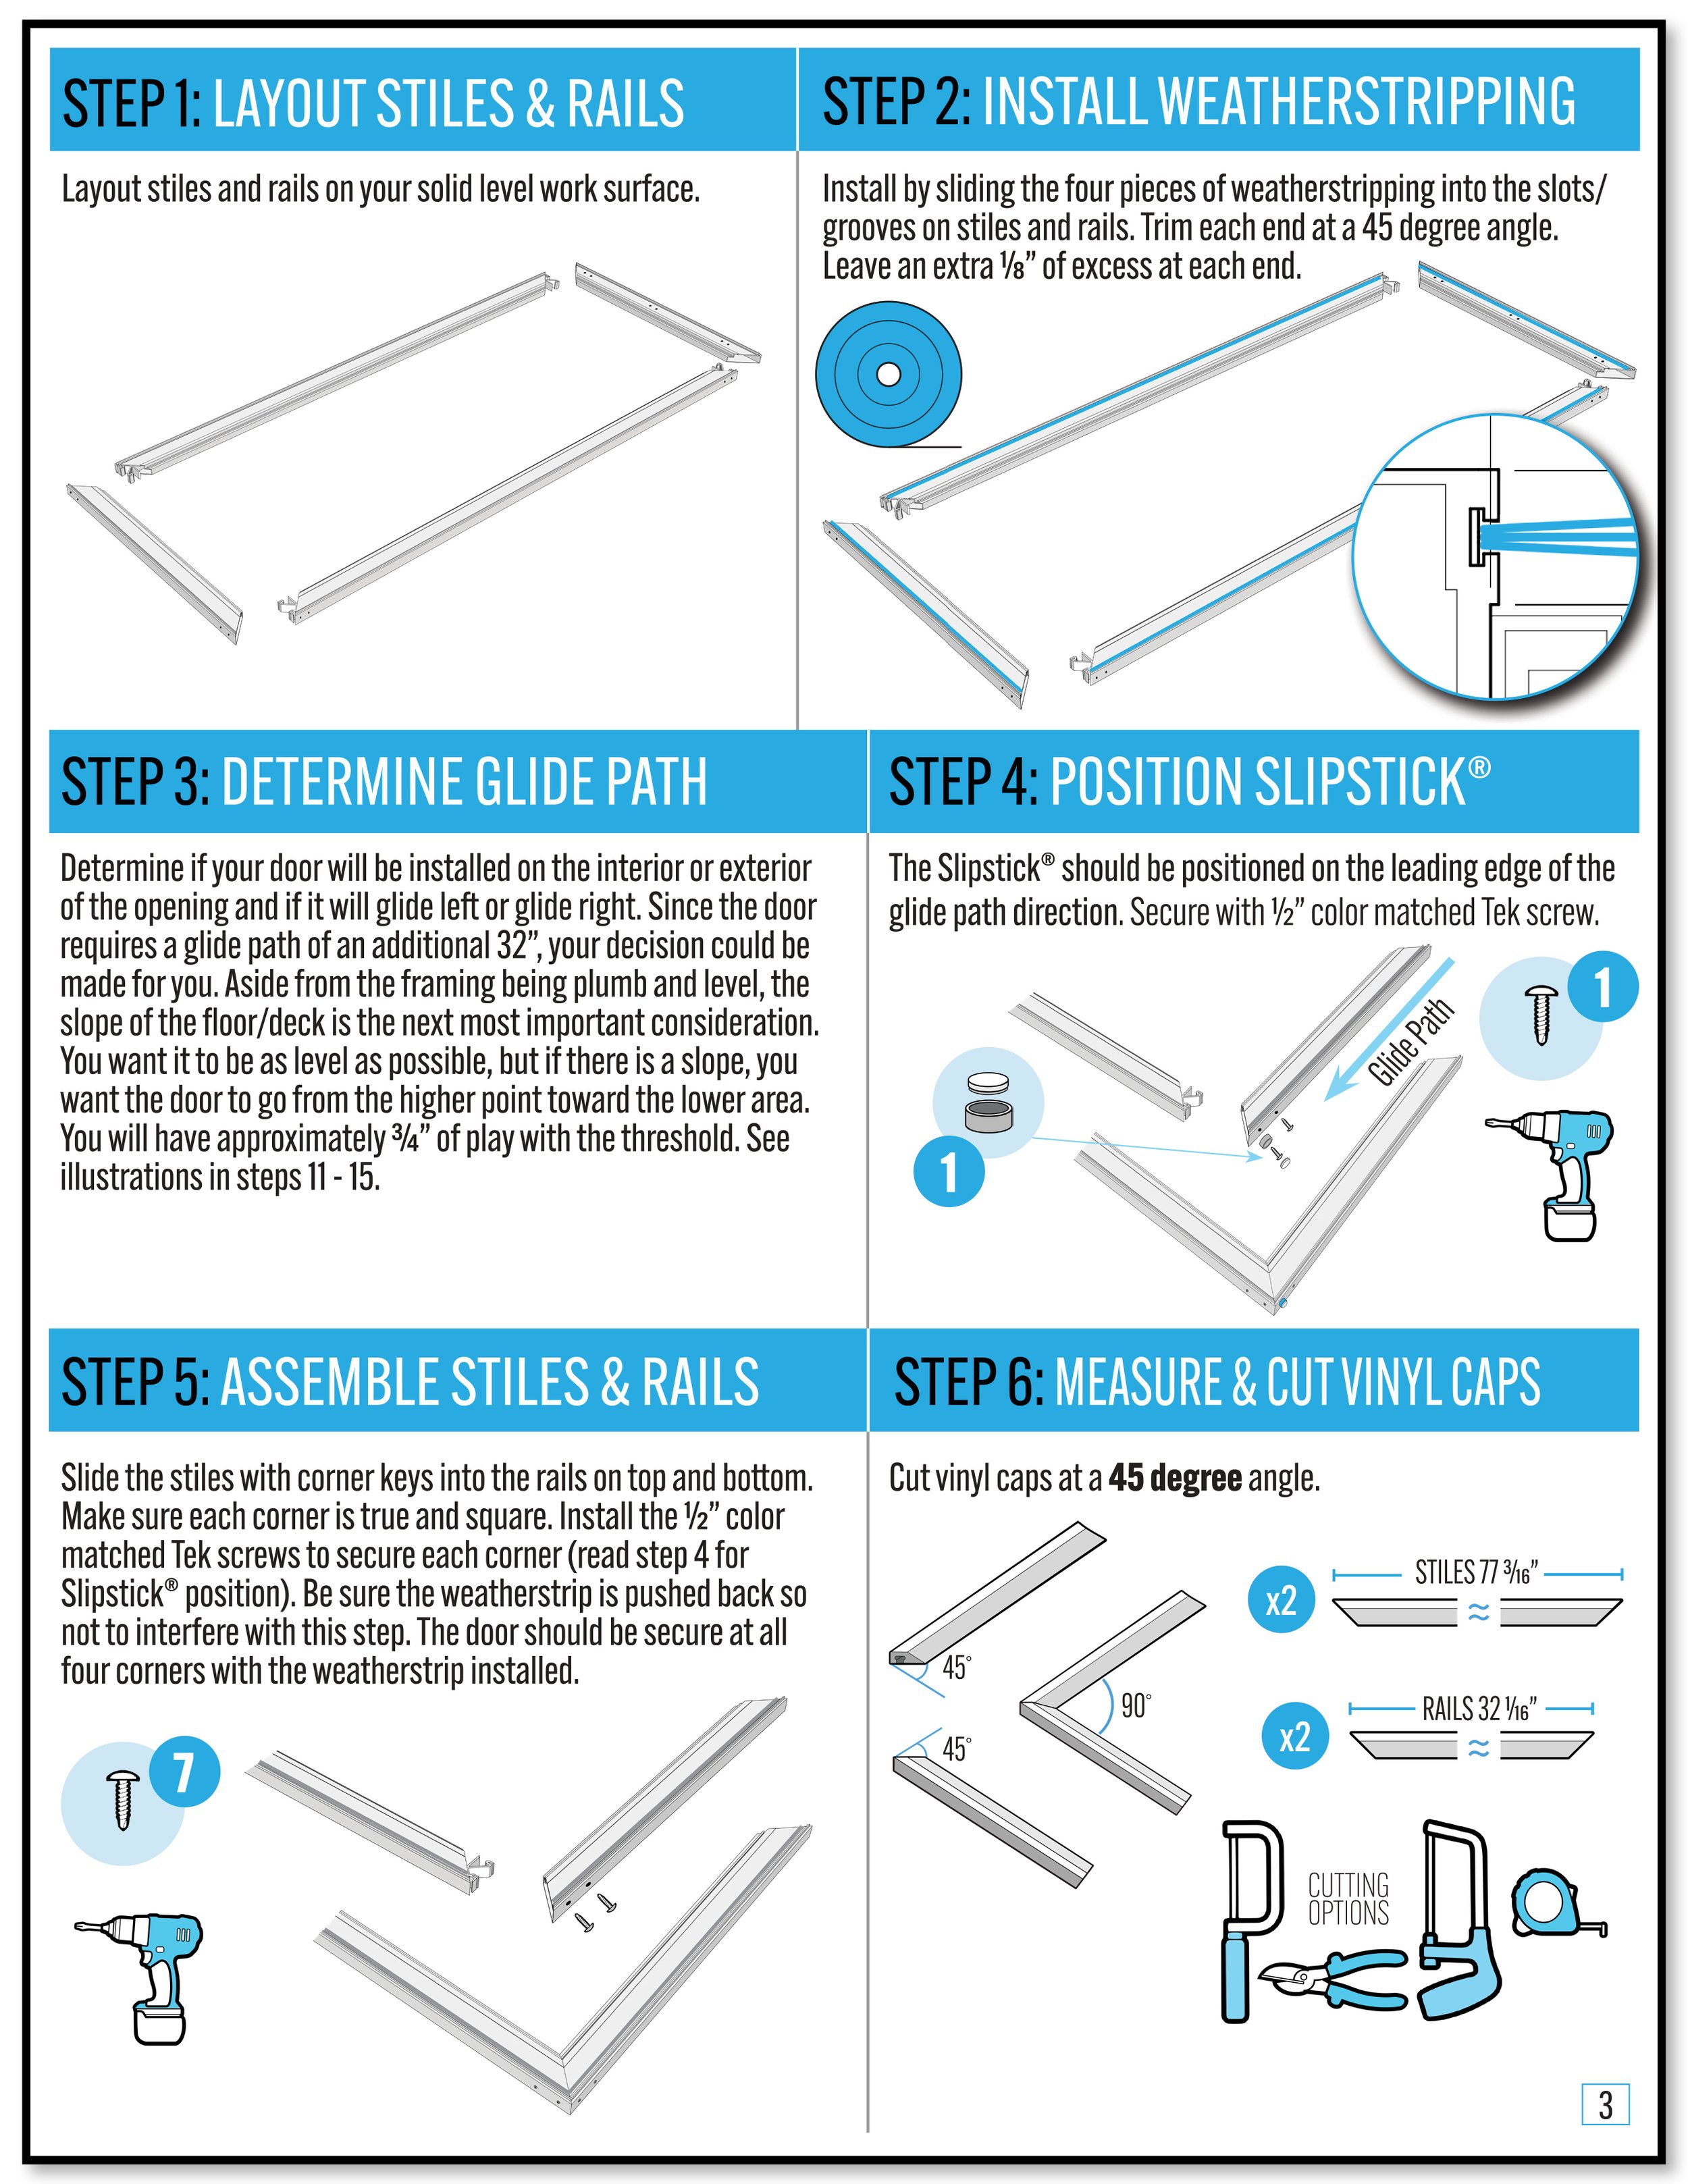
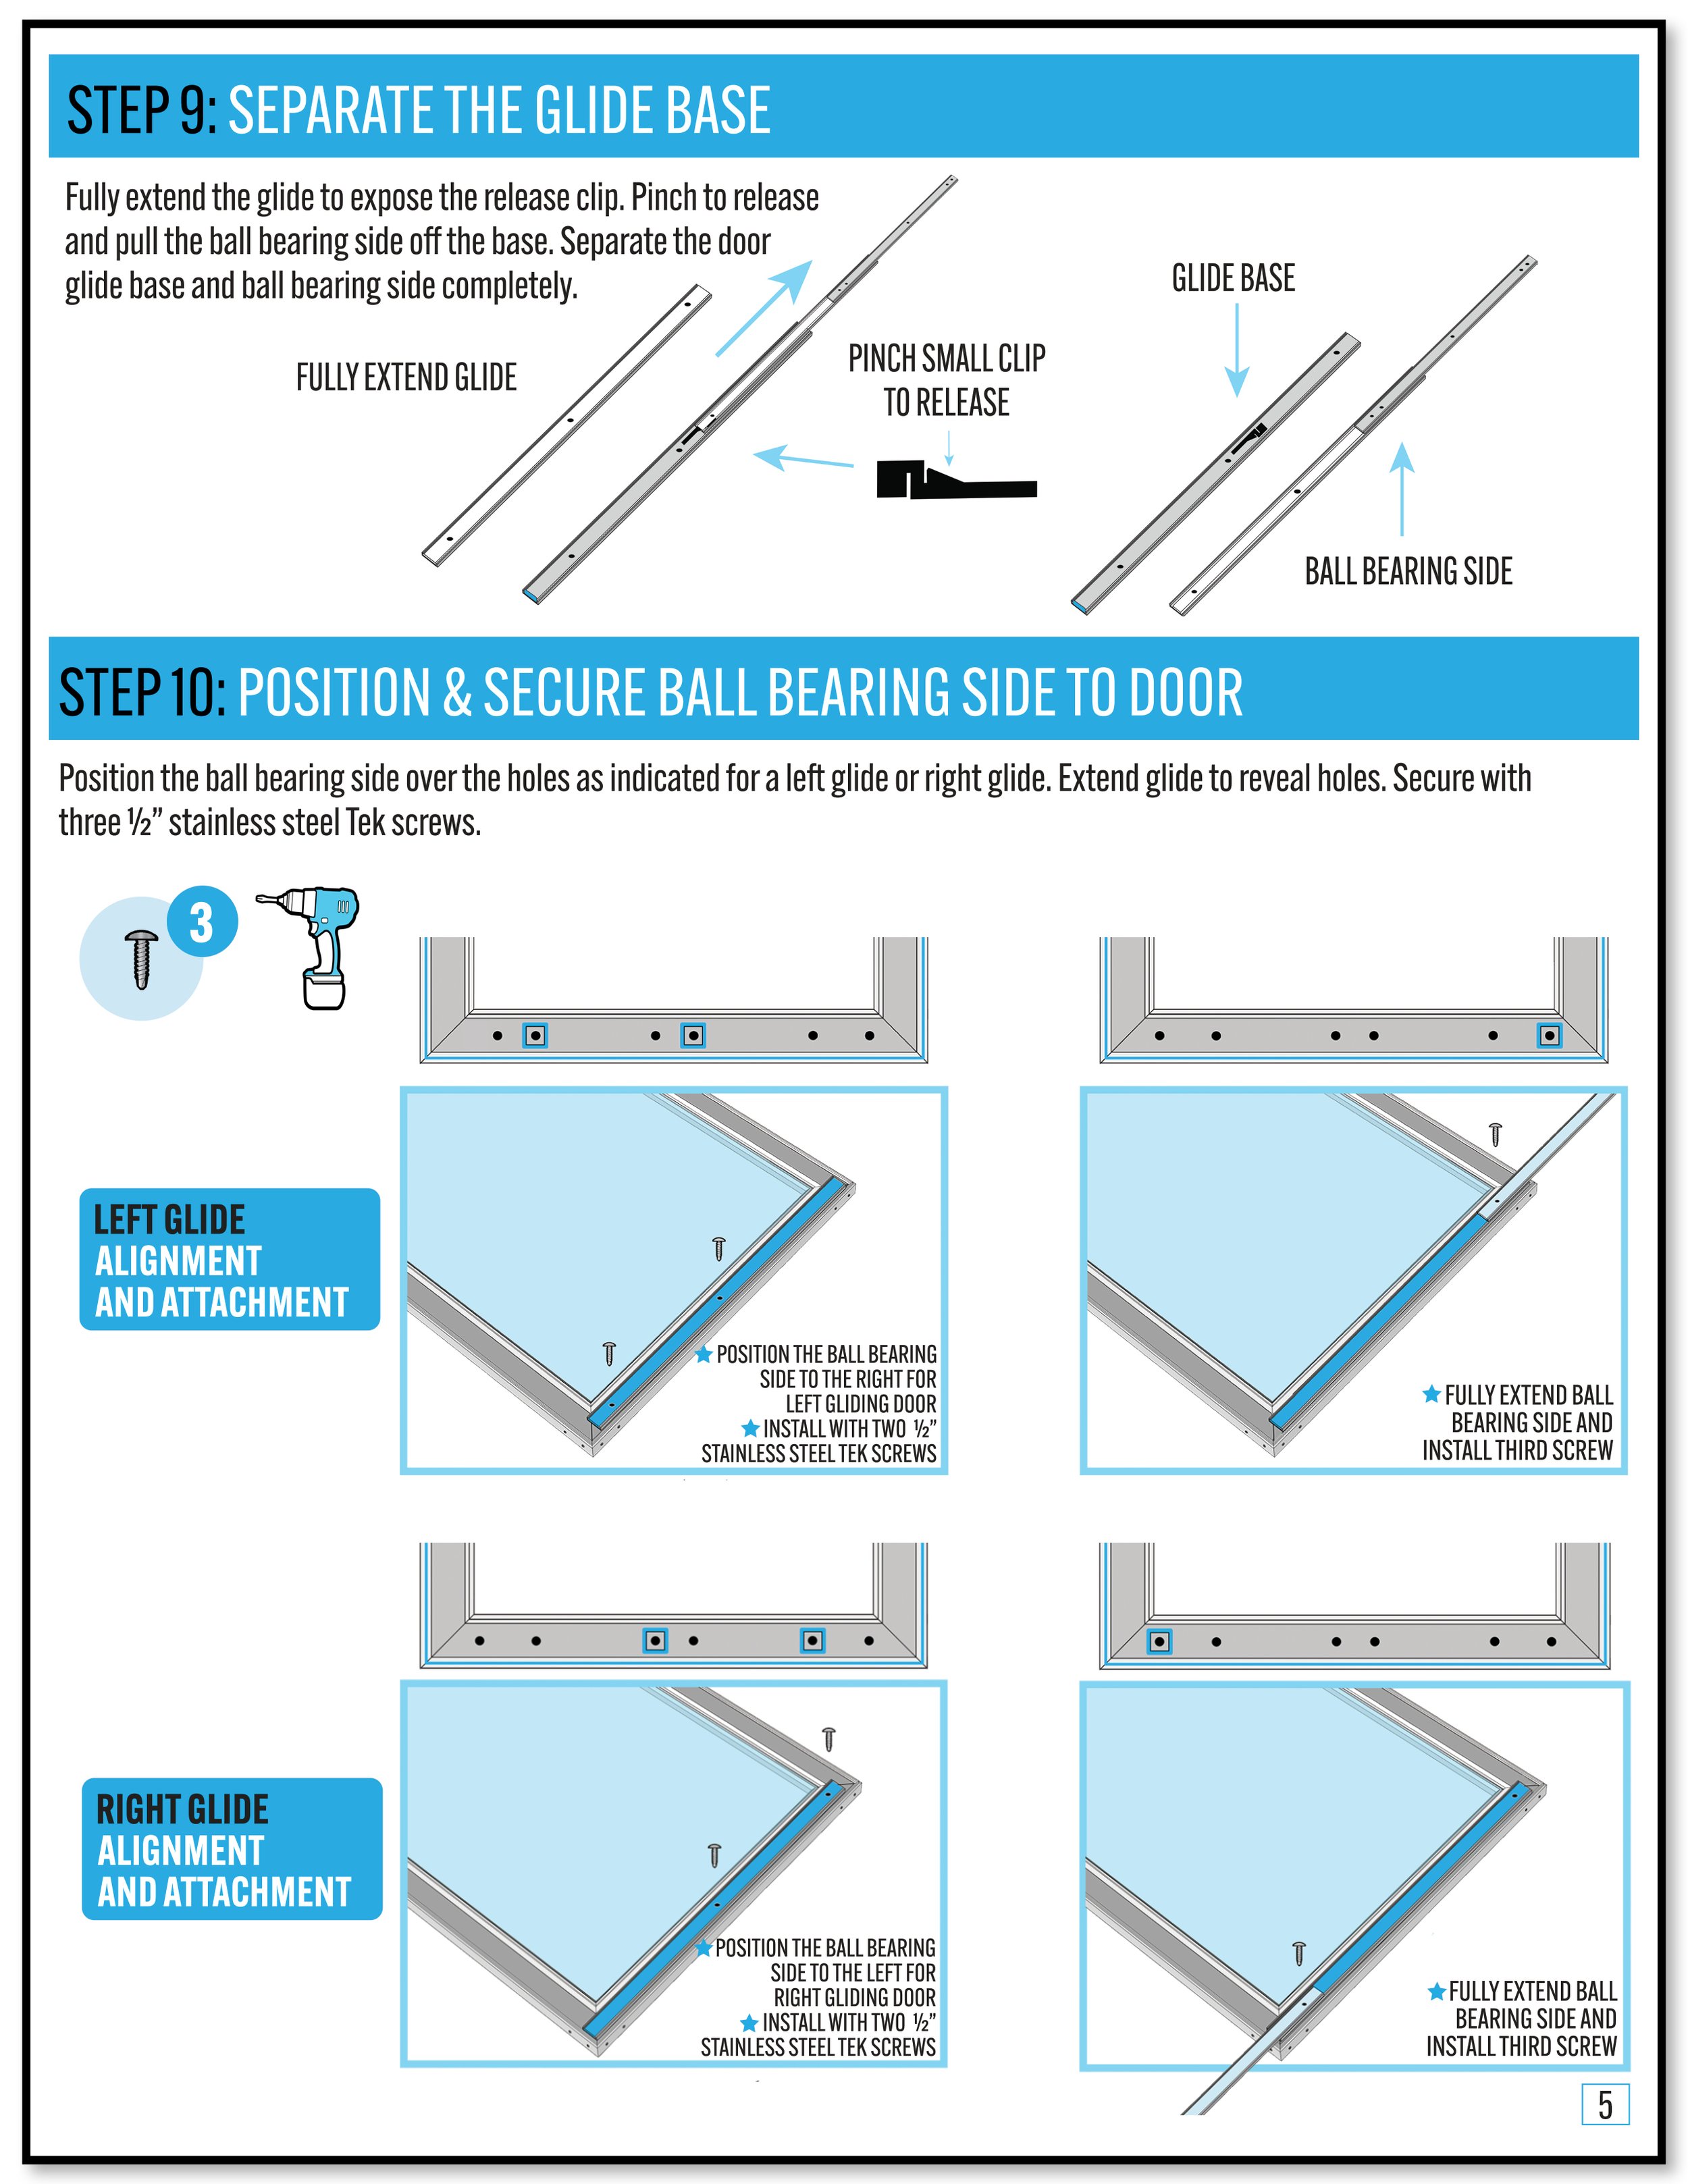
the sliding screen door


ARCH SYSTEM | FLATBAR


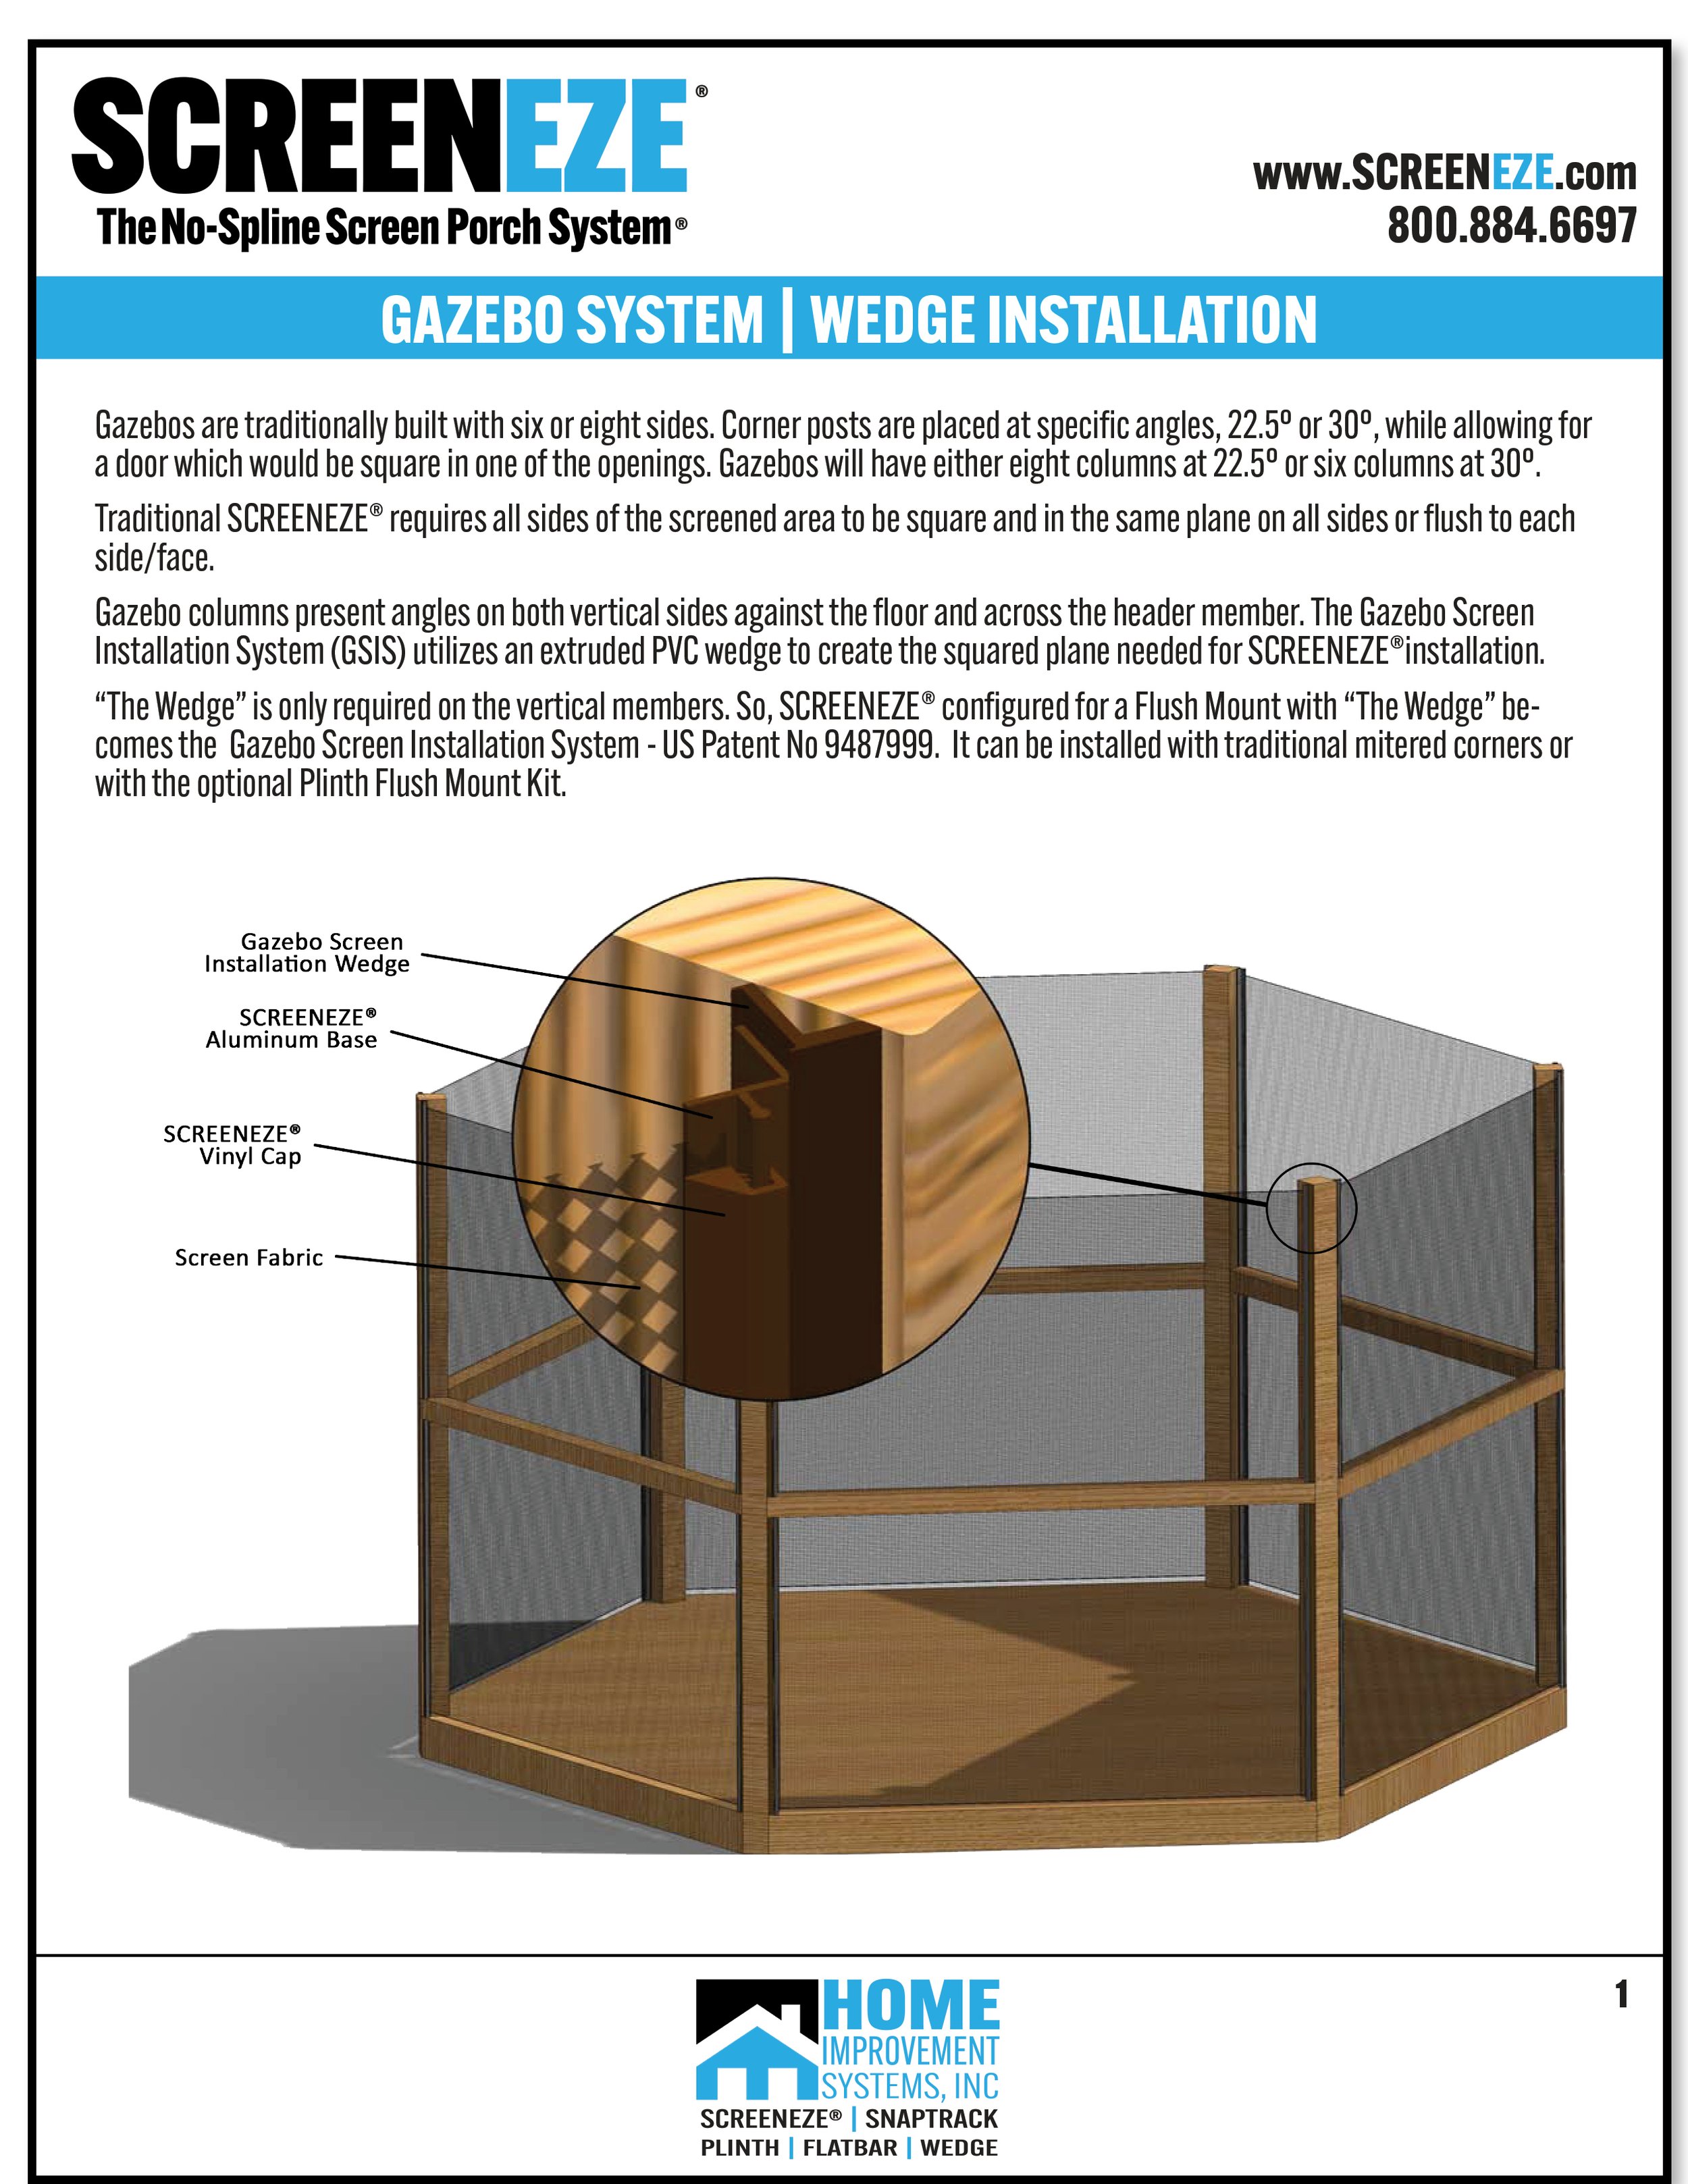
gazebo SYSTEM | wedge


INSTRUCCIONES EN ESPAÑOL
FAMILY OWNED & PROUDLY MADE IN THE USA
“SCREENEZE is a great product for your screen porch project. It is known within the industry for its adaptability and ease of installation. Plus, it will allow a 150 square foot opening with a single screen allowing homeowners to open their view and reduce the amount of framing on their project.
Builders love the product because of its ease of installation and because they can complete a professional, finished look on almost any sized opening (including curved arches).
The product also performs well in high-wind areas where traditional stapled screens under-perform.
Finally, since the system does not require a spline, screen replacement is simple, if there is a need after the system is installed.
A great American-made product.”